Raspberries are an asset to any garden. But their extensive root growth can quickly become a problem. With the right instructions for a root barrier for raspberries, you get the solution.
Contents
Raspberries – root barrier useful
Raspberries are flat-rooted, but their root growth each year takes more area in all directions. Some offshoots are then formed from stolons, which promise a higher harvest, but there may be some problems with it, which are not insignificant:
- Trouble with neighbors if roots grow over onto their property
- More root mass means significantly more nutrients and moisture needed in the soil
- Roots can compete with other plants (take away or displace nutrients)
- Can grow under lawns and create uneven surfaces and tripping hazards
- The more extensive the root growth, the more difficult plant to remove or replant
Root barrier function
Root barriers are used to confine a specific area in the ground. They are made of materials through which roots cannot pass and thus cannot spread uncontrollably throughout the garden and/or across property lines. When installing root barriers, it is important that they still leave the plants enough space in the ground, so that they can still develop well – but only within a defined space.
Ideally suited materials
- Special rhizome barrier films made of high-pressure polyethylene about two millimeters thick (available at any garden supply store).
- Pond liner with a minimum thickness of 1.5 millimeters
- Bitumen roofing felt (the thicker, the stronger – recommended V13 with 1,300 grams per square meter)
- Stainless aluminum sheet
- Lawn edging
Timing
If the roots have already spread too far, the root barrier for planted raspberries should always be placed after the harvest in summer or fall. Roots may have to be shortened in the process or may be severely injured. When setting in the spring, this could have a negative impact on growth and especially on fruiting.
The best time to build root barriers is right when planting or transplanting. This can set a growth limit for the raspberry bushes from the beginning. Time and extra effort for the renewed / subsequent digging save hobby gardeners thus.
Setting depth of the barrier
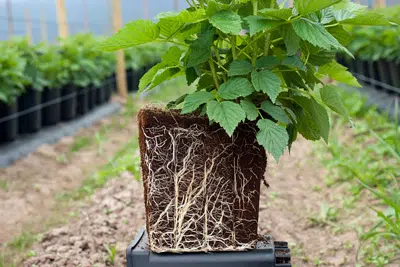
Despite the fact that the raspberry is one of the flat-rooted, the depth of planting should be at least 40 centimeters. The outriggers gain special vigor when the plant has too little water and/or nutrients available due to the area delimitation, which can happen quickly, especially in summer. Then it “sends” its outriggers in search of it, if necessary also further into the soil depth. If you want to be on the safe side, choose a planting depth of about 60 centimeters, because below that the raspberry roots usually do not go.
Note: Root barriers should always protrude about five centimeters from the soil surface, so they should be at least five centimeters higher than the hole in the ground is deep
Root barrier area
Border
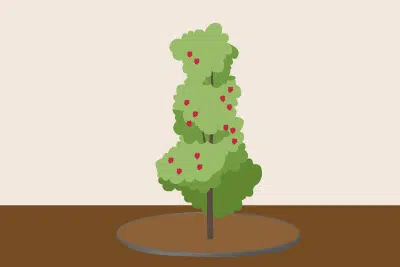
If the rhizome barrier is to completely surround the root zone of raspberries, the diameter should be about 40 centimeters larger than the expected width of growth. For most varieties, this is between 80 and 120 centimeters. For example, this gives a root barrier diameter of 120 centimeters for an 80 centimeter growth width – 160 centimeters in diameter for a 120 centimeter width.
Where space is not a particular issue, it is advisable to choose a generous root barrier area so that sufficient water can be stored and you do not have to water constantly, especially on hot summer days
Longitudinal border
Often, a rhizome barrier is also used only so that the roots do not climb into the neighboring property, but in their own property may well spread. Then the root control should be placed only longitudinally to the property boundary. If a square meter minimum is assumed, longitudinally drawn root barriers should be placed at a distance of 50 centimeters from the center of the plant. Since this may provoke lateral root spread, a rhizome barrier length of at least twice the maximum growth width is recommended.
Required utensils
- Folding rule/measure
- Spade
- Sufficiently deep and long root barrier material
- Connecting rail for round/oval root barriers
- Possibly wheelbarrow or tarp for soil excavation (advisable if lawn is directly adjacent)
- Mulch
Instructions
Planting raspberries with root barrier
The easiest option is to build root barriers if a planting hole is to be dug anyway for planting and transplanting. The following should be noted:
Planting raspberries with root barrier
The easiest option is to build root barriers if a planting hole is to be dug anyway for planting and transplanting. The following should be noted:
- Pay attention to minimum size/spacing/depth
- Smooth and bevel planting hole all around
- Insert barrier at a slight angle to appropriate depth
- open elements must be closed (see “Building a closed root barrier”)
- Mix soil generously with mulch
- carry out normal planting procedure
Build closed root barrier for raspberries
- place “open” barrier in trench
- allow ends to overlap
- if it sits properly, press overlap area well together with fingers and pull barrier out again
- connect overlap firmly and tightly
- Any excess can be left in place or cut off.
- insert and continue as described above
Tip: There are special connecting rails available in specialty stores / hardware stores. These are simply pushed onto the two ends and screwed or clicked tightly together so that they are tight and no roots can find a way through. Glued joints are not recommended
Insert afterwards
- measure and mark desired area as previously described
- dig trench with spade along markings
- do not dig to total depth immediately, but go deeper evenly all around piece by piece (otherwise risk of collapse of edges)
- Slightly slope the soil to the ground surface
- fill in excavated soil again (on the inside of the barrier) and press down well
- loosen soil around plant and enrich with mulch


