In winter, fresh vegetables from the garden is rare, yet there are some specialists. The kale can stand in the bed all winter and is also particularly rich in nutrients! How you can successfully grow the healthy winter vegetable, you will learn in this article.
- At a glance
- Sowing from mid-May – June
- Planting from June – early August
- Harvesting from November until spring
- Sowing depth: 2 cm
- Planting distance: 40×50 cm
- Position: sunny to semi-shady
- Soil: rich in nutrients and humus, prepare bed with compost or manure
- Good neighbors: tomatoes, beans, endive, lettuce, leaf lettuce, peas, potatoes, leeks, chard, beet, celery, spinach, radicchio, mugwort, dill, chamomile, coriander, caraway and peppermint.
- Bad neighbors: strawberries, garlic, onions, mustard and all other cruciferous plants
- Crop rotation: good second crop for early potatoes
- Crop rotation: at least 3 years break between cabbage crops
Contents
General information about kale
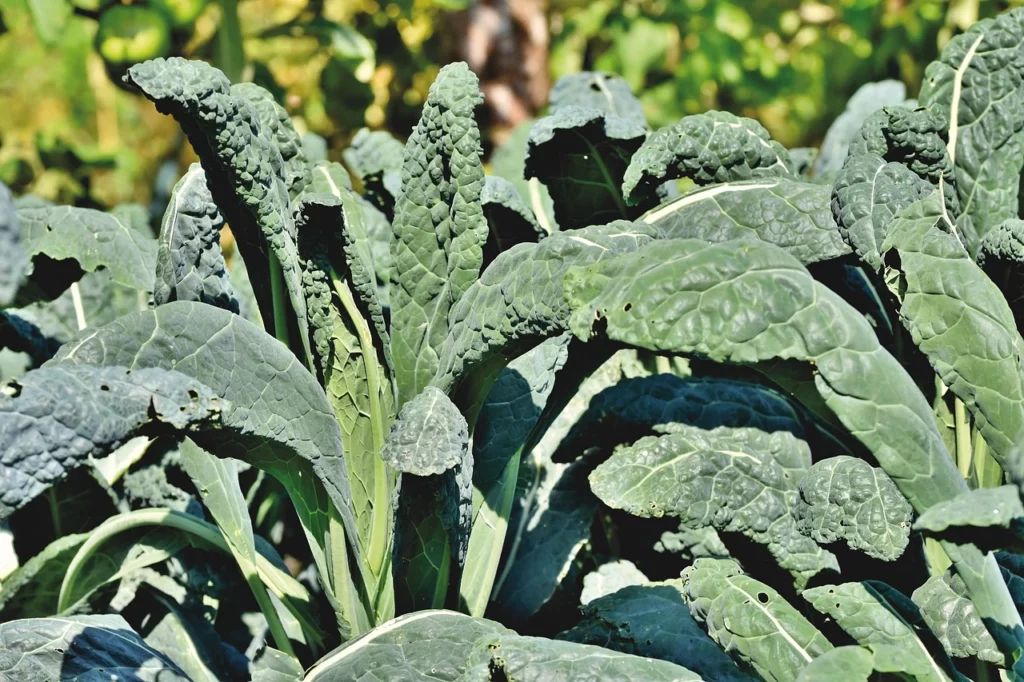
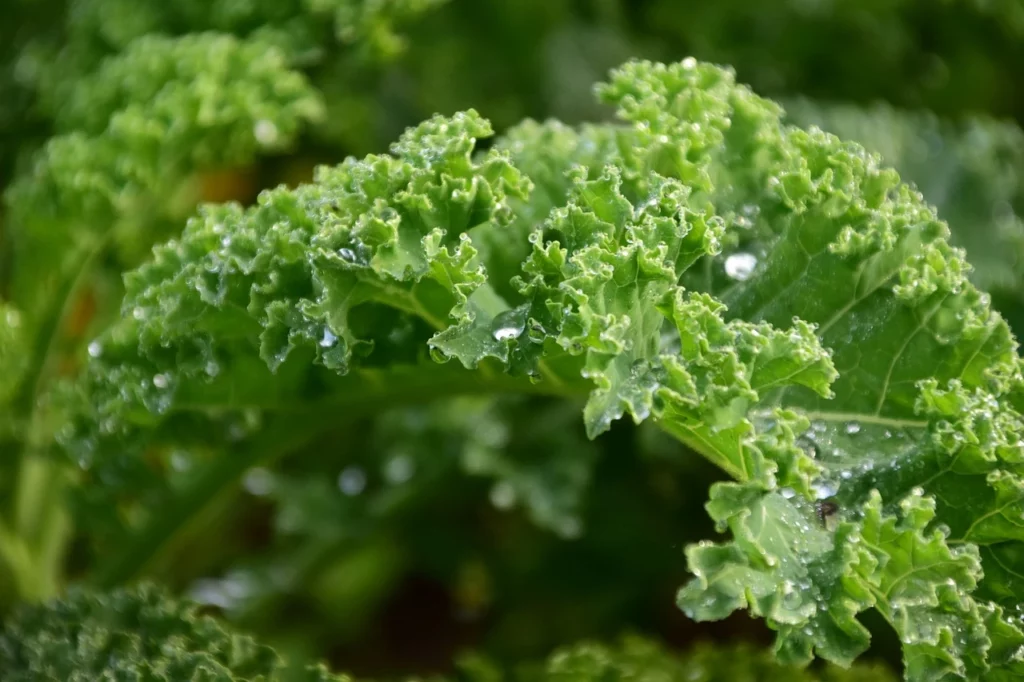
Kale (Brassica oleracea var. sabellica) belongs to the cruciferous family (Brassicaceae) and is thus related to radishes, red cabbage and Brussels sprouts. It forms a tall, sturdy stem on which more or less curly leaves grow. Among cabbage varieties, kale is considered one of the healthiest. It contains a lot of fiber and, like Brussels sprouts, has a higher protein content than other types of cabbage. It also contains a considerable amount of iron, as well as the minerals potassium and calcium. It provides almost all B vitamins, vitamins E and C, and provitamin A. Due to its high protein and iron content, kale is a super supplement for a complete diet, especially for vegetarians and vegans.
The best location
Kale is more modest in its requirements than head cabbage and Brussels sprouts. A semi-shaded spot in the garden is sufficient for him, but full sun will not harm him either. Like all cabbages, it prefers soil rich in humus and nutrients, but it is less hungry than its heavy-growing relatives. Kale can also grow in light sandy soils, but you should prepare the soil a bit. For better water and nutrient retention, you can enrich your sandy soil with mature compost or rotted manure. Here you can find more information about soil improvement and what to consider. Kale remains on the bed throughout the winter, it can withstand temperatures as low as -15 °C and can always be harvested fresh, even during the cold season.
Crop rotation, crop rotation & mixed culture
Ideally, kale grows after one year with nitrogen-collecting legumes such as beans or peas. They enrich the soil with nitrogen, creating a nutrient-rich foundation for kale. Be sure to maintain a growing interval of at least three years from other cabbage crops. If your cabbage was affected by diseases, even five to six years is recommended. In the same year, kale is suitable as an after-crop for potatoes.
Good neighbors are tomatoes, beans, endive, lettuce, leaf lettuce, peas, potatoes, leeks, chard, beet, celery, spinach and radicchio. Also suitable are herbs such as mugwort, dill, chamomile, coriander, cumin and peppermint.
Bad neighbors are strawberries, garlic, onions and mustard. In general, you should avoid other cruciferous plants (e.g. radish, radish, other cabbage varieties) as neighbors to prevent pests such as cabbage hernia!
Kale varieties
Extremely frost-hardy, late varieties are usually dark and blue-green in color. Earlier varieties have a lighter color.
- Vitessa: Early variety with light green, finely crinkled leaves.
- East Frisian Palm: Traditional, tall variety (up to man-high on nutrient-rich soils). Sowing already from mid-April.
- Low Green Curly: Height about knee-high, making it particularly stable and suitable for small gardens.
- Vates Blue Curle: Frost-resistant, low variety.
- Westwood Winter: Heavily curly, blue-green leaves. Can be harvested through March.
- Lark’s Tongues: Winter hardy, semi-high variety with long, narrow leaves.
- Semi-high Green Curly: Dark green, frost hardy variety with high yields. Freezes particularly well.
- Western Winter: Traditional, organic cultivar.
- Nero di Toscana: Italian variety with palm-like growth and steel-blue leaves. Particularly decorative, the taste is reminiscent of broccoli.

Sowing & planting kale
You can grow your seedlings in small pots from mid-May to June. Since it is already quite warm at this time of year, you can place the pots outdoors. Due to the outdoor climate, the seedlings grow healthier and become more robust overall. Prepare the planting hole in the bed well with compost or rotted manure. Then plant the seedlings 40 x 50 cm apart from June to early August. Late planting allows larger gaps in the bed to be filled. Set the seedlings a few centimeters deeper in the soil than they were in the pot – this will make them more stable. Alternatively, kale can be sown directly into the bed from mid-May. To do this, draw rows 2 centimeters deep and place a seed in the depression every 15 centimeters. This way you can harvest your kale like spinach for now and let some plants grow out later. Always cut off the outermost leaves and leave the heart, new leaves will grow here.
Care for kale properly
Like all cabbage varieties, kale needs consistent soil moisture to grow healthy. You should water your kale regularly, especially in mid-summer when the large leafy areas are forming. Mulch can help keep the soil moist and stimulate soil life. For example, fresh lawn clippings spread evenly over the bed are suitable for this purpose. The taller the plant gets, the more stable it should be. Over time, you can therefore mound your kale from time to time, this promotes root growth and stability. During the main growing season, you can fertilize every two weeks with some nettle manure or compost tea. Those who have problems with the cabbage white butterfly should rather reach for the compost tea, since nettle liquid manure can attract the white butterflies.
Diseases & pests
As a preventative measure for pests, it is imperative to maintain a growing interval of at least three years between cruciferous crops. If disease is present, this should be extended to five to six years.
Cabbage hernia: A fungal disease that attacks the roots, causing them to thicken in lumps. Sprinkle a tablespoon of seaweed lime into the planting hole as a preventative and keep the growing season between crucifers.
Whiteflies: they sit on the underside of leaves and suck the plant sap, making the leaves sticky. Spraying with neem oil can help here.
Cabbage whitefly: the caterpillars eat the leaves and leave their droppings. They are very voracious and can eat entire plants bare. Therefore, after planting, seedlings should be covered with vegetable nets.
Earth fleas: they eat holes in the leaves in dry weather. An evenly moist soil (e.g. through mulch) can have a preventive effect.
Harvest & process kale
Harvest your kale only after the first frosts, only then it tastes really good. In general, the longer your kale is exposed to winter temperatures, the sweeter and milder its flavor will be. The stored starch is converted into sugar at cool temperatures, but sub-zero temperatures are not permanently required for this. The main harvesting period is usually from November to January, although fresh young shoots can occasionally be harvested in the spring. Generally, the outer leaves of kale are harvested first. They are tougher than the young leaves and should therefore be cooked longer. The inner, young leaves, on the other hand, taste particularly fine. They are particularly aromatic and are not called heart for nothing. To allow the kale to continue growing in mild weather, you should leave the stalk and the heart. It is best stored alive on the bed, similar to leeks. The leaves will only last a few days in the refrigerator, but you can freeze it without hesitation. Traditionally, kale is prepared as a side dish with meat, but homemade kale chips are also very popular at the moment. When cooking, make sure to heat the kale as slowly as possible to preserve most of the vitamins.
Kale chips: It’s easy
You’ll need 500 grams of fresh kale, 4 tablespoons of vegetable oil, salt and pepper, and 2 tablespoons of sesame paste or peanut butter to taste. The preparation is very simple and goes quickly: Pluck the kale and free it from strong stems. Then mix the marinade of sesame paste, oil, salt and pepper, dip the kale pieces in marinade and place them on a baking sheet covered with baking paper. Finally, gently bake in the oven at 140 °C for about 20 minutes.


