Clematis, also known as the queen of climbing plants, captivates with its abundant blooms and variety of shapes and colors. The best part? You can easily propagate all types and varieties of clematis yourself—whether you’re a beginner or seasoned gardener. In this guide, we’ll show you step by step how to propagate clematis by layering or cuttings, and offer practical tips for success.
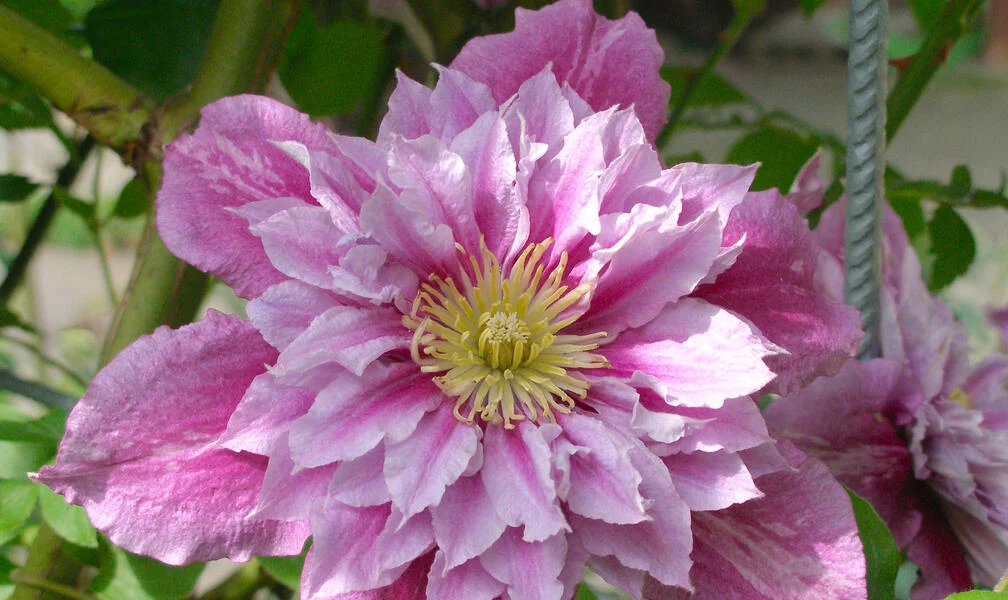
The clematis is the most species- and variety-rich hardy climbing plant. And the best part: all types and varieties can be propagated very easily throughout the entire year. We have some tips and a step-by-step guide for you.
There’s hardly a gardening enthusiast who doesn’t love clematis. Thanks to intensive breeding, countless varieties have emerged over time in a wide range of colors and combinations. In addition to the climbing shrubs, there are also different species of herbaceous clematis, although these are mostly known among dedicated enthusiasts.
Whether planted in the garden or in pots on a balcony, these floral beauties are always eye-catching. The good news is: all clematis types can be easily propagated by layering, and taking cuttings has also proven highly effective. We’ll show you how to grow your own new clematis plants using these methods.
In Short: How Can You Propagate Clematis?
Clematis can be propagated vegetatively by layering. The shoot used should be strong, but not too old. Once the layered young plant has formed enough of its own roots, it is separated from the parent plant. To propagate clematis by cuttings, take sections from a healthy shoot and place them in pots filled with seedling soil. Keep them moist and covered in a bright spot until they develop roots.
When Can You Propagate Clematis?
If you want to propagate your clematis by layering, you can do so any time of the year. Even in winter, you can lay down shoots, as long as the ground isn’t frozen. Propagation by cuttings works best when healthy shoots are taken between late spring and summer.
Contents
Propagating Clematis by Layering
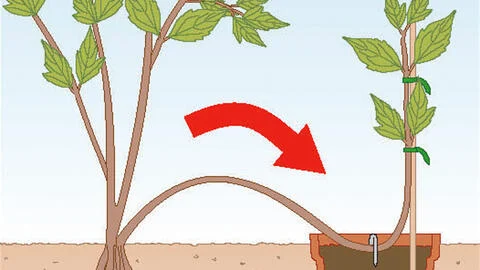
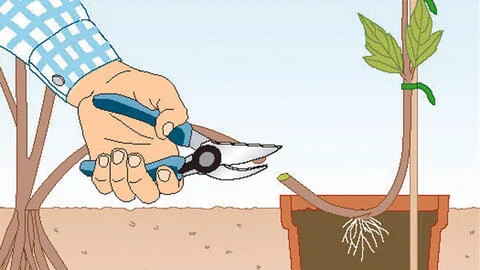
Guide the clematis offshoot into a flower pot embedded in the soil and simply secure it with a tent peg (left). When the offshoot is well rooted, you can separate it from the mother plant (right)
Whether you want to propagate herbaceous or climbing clematis by layering, all you need is a parent plant, a sharp knife, a bamboo stick, a flowerpot, a spade, and a bit of patience. Here’s how to do it:
Laying Down the Clematis Shoot
Choose a strong, not-too-old clematis shoot and, if necessary, detach it from its climbing support. Then fill a flowerpot to the brim with seedling soil and sink it level into the ground within reach of the shoot. Now lay the clematis shoot flat into the soil and secure it with a metal hook, such as a tent peg. If there are any leaves in the area to be buried, remove them first—leaves that come into contact with the soil are prone to rotting. Guide the end of the shoot upwards using a thin bamboo stick so the new plant grows upright later on. Important: After laying down the shoot, make sure the soil in the pot doesn’t dry out.
Cutting Off the Clematis Layer
Leave the laid-down clematis shoot connected to the parent plant until the following spring—only then can you be sure that the young plant has developed enough of its own roots. To check, gently remove the soil ball from the pot: if it’s well-rooted, use pruning shears to cut the connection to the mother plant. The young clematis can either be grown in a pot for another year or planted directly into the garden. In the first few weeks, keep it well-watered. It’s also recommended to pinch off the tip so the new clematis branches out well from the base.
How to Propagate Clematis by Cuttings
Clematis can be propagated not only by layering but also quite easily by cuttings. As a hobby gardener, this method is especially effective for small-flowered types like the Italian clematis (Clematis viticella), alpine clematis (Clematis alpina), Clematis macropetala, mountain clematis (Clematis montana), and Clematis texensis. To propagate clematis by cuttings, all you need is a sharp, clean knife, rooting hormone, and some seedling soil. A mini greenhouse has also proven to be very effective for rooting cuttings.
Step-by-Step: Propagating Clematis by Cuttings
Step 1: Divide the Clematis Shoot into Several Sections
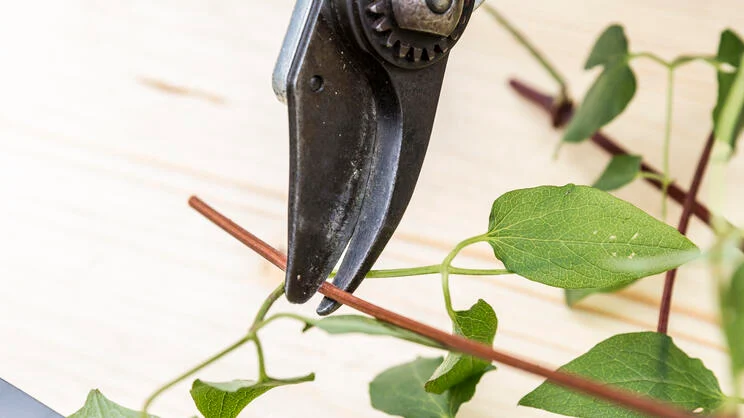
Take a healthy clematis shoot and cut it into several sections using pruning shears.
Step 2: Trim and Angle the Sections
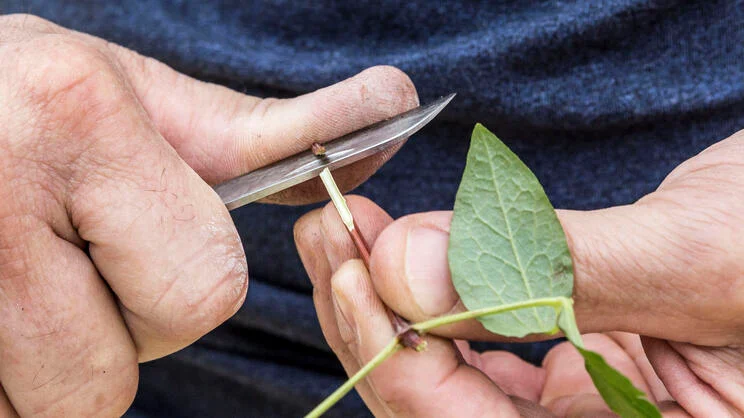
With a sharp knife, cut each section about half a centimeter above a leaf node. Then make a slanted cut about three to four centimeters below that to increase the surface area for rooting.
Step 3: Remove the Outer Leaves
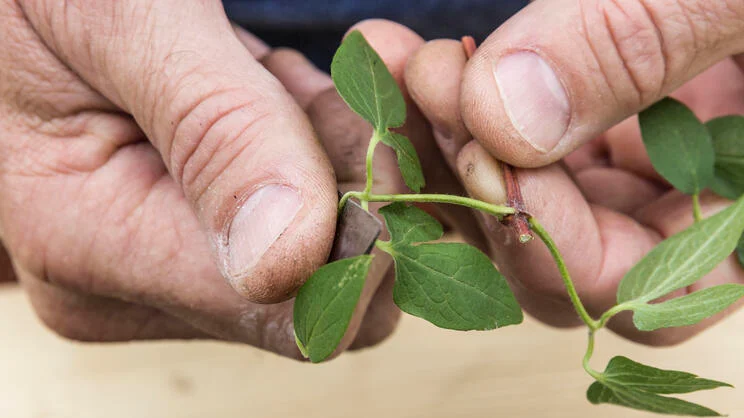
Remove the outer leaves from the cuttings to reduce the surface area for evaporation.
Step 4: Pot the Clematis Cuttings
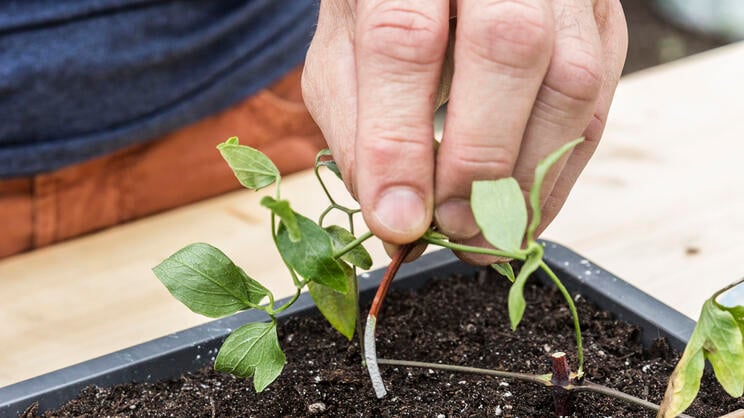
Dip the cuttings into rooting hormone (e.g., Neudofix) and insert them at a slight angle into trays or pots filled with seedling compost, up to the leaf pair.
Step 5: Spray the Cuttings
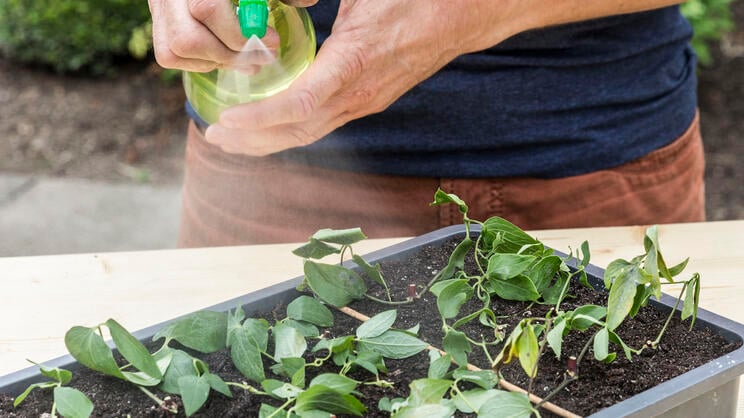
Gently water the cuttings and spray the leaves with water.
Step 6: Cover with a Mini Greenhouse Lid
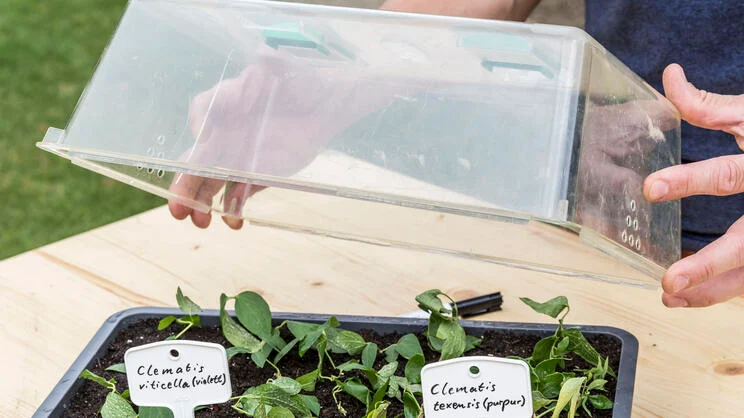
Place a plastic dome or lid over the cuttings to maintain a warm, humid environment. Keep them in a bright but not sunny spot at 20–25°C (68–77°F) and ensure the soil stays consistently moist. Roots should form within two to four weeks.
Tips for Choosing the Best Garden Location
Once your clematis propagation has been successful and the young plants are ready for the garden, it’s time to choose the best possible location. As the German name “Waldrebe” (forest vine) suggests, clematis naturally grows on the edges of woodlands. In the garden, it prefers a spot where its base is shaded and its upper parts can bask in the sun. An east- or west-facing area near a fence or pergola is ideal for climbing varieties. What’s important is that the soil is well-draining, rich in humus, and evenly moist. This also applies to herbaceous clematis, which prefer open, sunny locations but will also tolerate partial shade.
With a little patience and the right technique, propagating clematis is surprisingly simple—and incredibly rewarding. Whether you’re looking to expand your collection or share new plants with friends, these methods will help you grow strong, healthy clematis from your existing ones. Happy gardening!


