If you don’t want your lawn to spread into flower beds, you need to install an edging. With our tips, you’ll find the right transition between lawn and bed for your garden.
A lawn edge requires regular care: If you don’t keep the grass in check, it will quickly invade nearby beds and compete with your perennials and roses. Depending on your garden style, space, budget, and bed size, there are several edging options available. Here are the most popular types of lawn edging and how to install them.
Contents
Lawn Edging Options at a Glance
- Natural Transition – The English Lawn Edge
This method involves regularly cutting the lawn back from the bed. Best for a seamless, natural look. - Paved Edges – For a Clear, Mowable Border
Ideal for structured, formal gardens. Easy to maintain and compatible with lawn mowers. - Flexible Edging Profiles – Metal or Plastic
Perfect for curved bed shapes. These are easy to install and almost invisible.
Classic: The English Lawn Edge
This refers to the seamless transition between lawn and bed. It’s popular for its natural appearance but requires regular upkeep.
- Maintenance: Trim every 4–6 weeks during the growing season using a lawn edging tool.
- Tools:
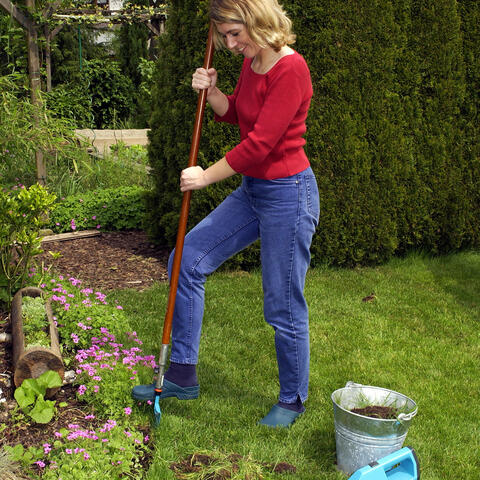
- Lawn Edging Tool: Sharp, flat blade with a rounded edge and a T-shaped handle. Stainless steel models are most effective.
- Alternative Tools: Sharp spade (for straight cuts) or even an old bread knife (only for small areas).
How to Create an English Lawn Edge:
- Lay a long wooden board along the edge for guidance (for right angles).
- Cut away excess grass with the edging tool.
- Remove the trimmed strip with a hand trowel and compost it.
- Over time, level differences may appear—fill in with topsoil as needed.
Paving Stones as Lawn Edging
Make lawn care easier with a stone edge. Special concrete edging stones—also called mowing edges—are available and can be mowed over.
- Advantages:
- Interlocking design for tight joints
- Easy lawn mower access
- Durable and low-maintenance
- Aesthetic Alternatives:
- Granite, brick, or clinker paving for a more decorative look
- Install in two staggered rows to prevent grass from growing through joints
How to Install a Paved Lawn Edge:
- Cut the lawn edge straight.
- Dig a trench one spade deep and as wide as the edging.
- Fill with compacted sand.
- Lay the stones slightly above lawn level and tap down with a rubber mallet.
- Use a string for straight lines or follow the curved lawn edge as a guide.
- Fill gaps with topsoil; they’ll naturally grow over.
- Fill joints with sand once the stones are laid.
Maintenance Tips:
- Occasionally trim the edge to cut creeping grass.
- Use a lawn trimmer with a 90° rotating head or cordless grass shears.
- Clean joints annually with a weed scraper and refill with sand if needed.
Metal Lawn Edging
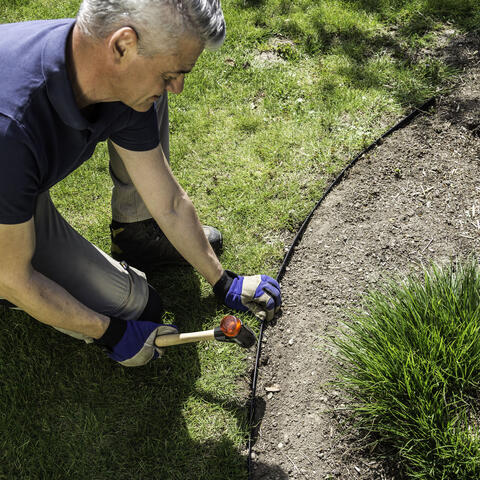
Metal profiles are sleek, modern, and effective:
- Materials: Stainless steel, galvanized steel, or aluminum
- Advantages:
- Hardly visible once installed
- Prevent grass encroachment
- Ideal for curved borders
- Available in widths from 10–30 cm
How to Install Metal Lawn Edging:
- Hammer into the soil gently (use a rubber mallet or a wooden block as protection).
- For hard soil, pre-cut a slit with a spade.
- Two-person installation is faster and easier.
- Avoid using a steel hammer directly—can damage the coating and cause rust.
Plastic or Rubber Lawn Edging
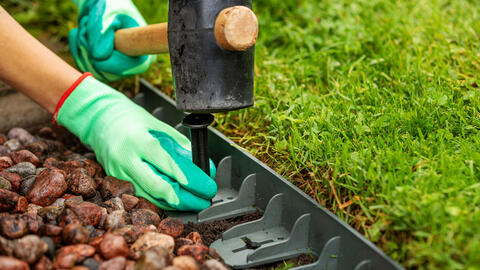
An affordable and eco-friendly option:
- Materials: Often made from recycled plastic or rubber
- Durability: Long-lasting and rot-resistant
- Format: Sold in 5–10 meter rolls, widths range from 13–20 cm
How to Install Plastic/Rubber Edging:
- Dig a trench matching the strip size.
- Slightly overlap the ends of different strips to avoid gaps.
- Bury deep enough to avoid contact with the mower blade.
- Avoid physical stress on plastic edges to prevent breakage.
Maintenance Tip:
Regardless of the material, trim the lawn edge occasionally. Use cordless grass shears instead of a trimmer for plastic/rubber edges to prevent damage.

