I’ve always loved rhododendrons—their vibrant blooms and lush green leaves bring so much life to the garden. Over time, my collection has grown, and with it, my curiosity about how to propagate these beautiful shrubs myself. Instead of buying new plants, I wanted to try a more personal and rewarding method: propagation by layering. It’s a simple technique that anyone can do in their own garden, and I’d like to share with you how it works, step by step.
In nurseries, rhododendrons are propagated through cuttings or grafting. However, in the home garden, a simple and proven method can be used: propagation by layering.
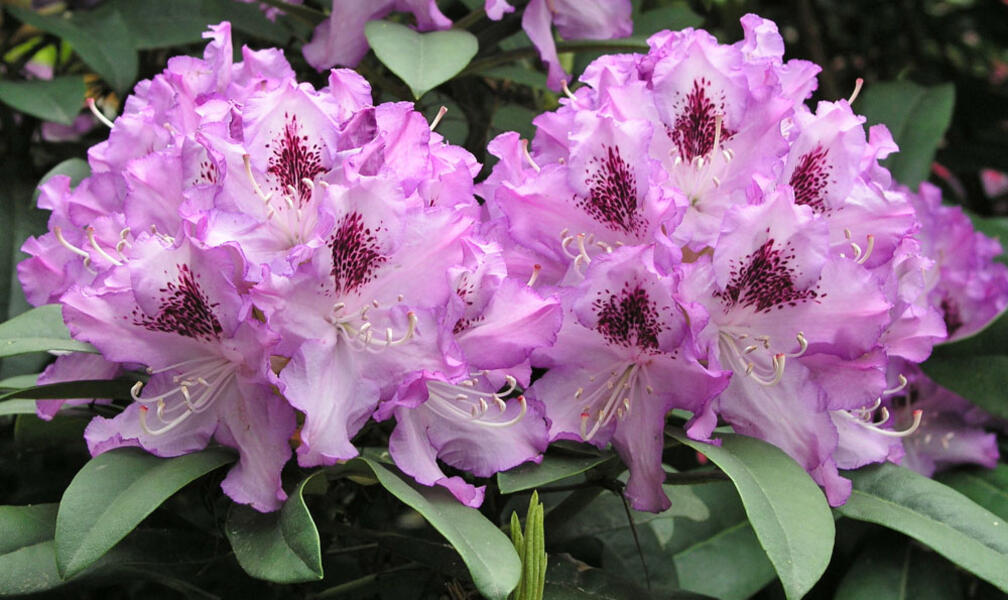
Rhododendrons often ignite a collector’s passion in many hobby gardeners, as there are hundreds of different varieties with a wide range of flower colors. Rhododendron hybrids are usually propagated by grafting in nurseries. In home gardens, however, layering is the best method of propagation. Growing new plants from existing ones also allows gardeners to easily swap varieties with other rhododendron enthusiasts. Another reason to grow your own rhododendrons is simply the joy of success.
Layering for the Hobby Garden
In professional horticulture, propagation by layering is not common because the space required for mother plants is relatively high and the yield of new young plants is too low. Additionally, rootstocks with good root formation, such as the variety ‘Cunningham’s White’ or the special lime-tolerant Inkarho rootstock, are needed. In the home garden, however, layering is quite practical since you don’t need large quantities and don’t have to adhere to horticultural standards in terms of plant quality and vigor.
Layering Rhododendrons: Step-by-Step Guide
Older rhododendrons with low-growing lateral shoots are best suited for propagation by layering. Here’s a step-by-step guide to successfully propagate your rhododendron using this method.
Step 1: Choose a Suitable Shoot
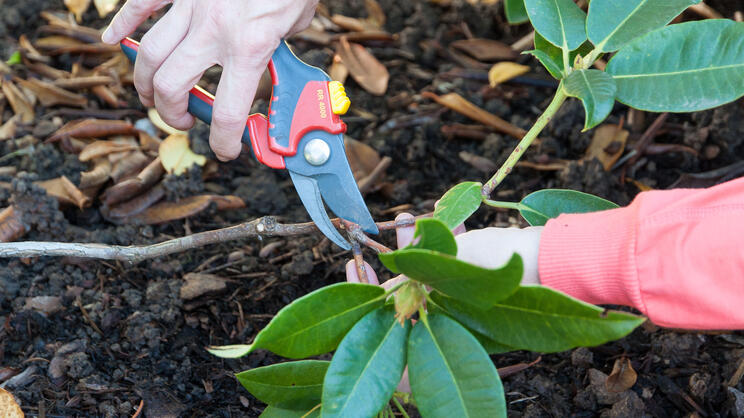
Look for a shoot that grows close to the ground and is long and not heavily branched. Important: Test first whether it can be bent down to the ground without breaking or significant resistance. Once you’ve found a suitable shoot, remove all side shoots using pruning shears. This ensures that the tip of the shoot receives optimal water and nutrient supply after layering.
Step 2: Cut a Strip of Bark
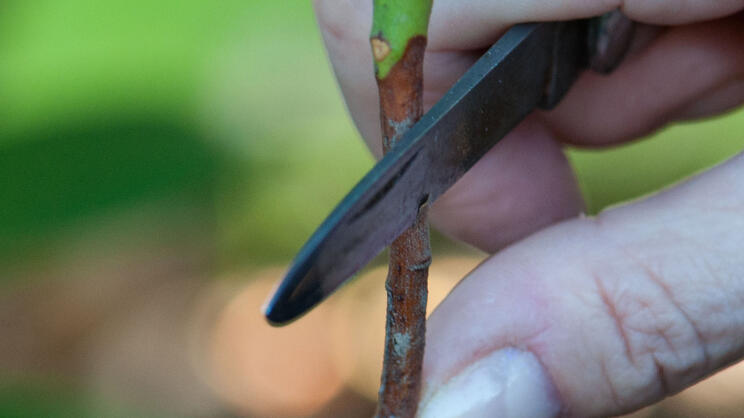
Use a pocketknife to cut a narrow strip of bark from the underside of the shoot section that will be buried in the soil.
Step 3: Check the Wounding Cut
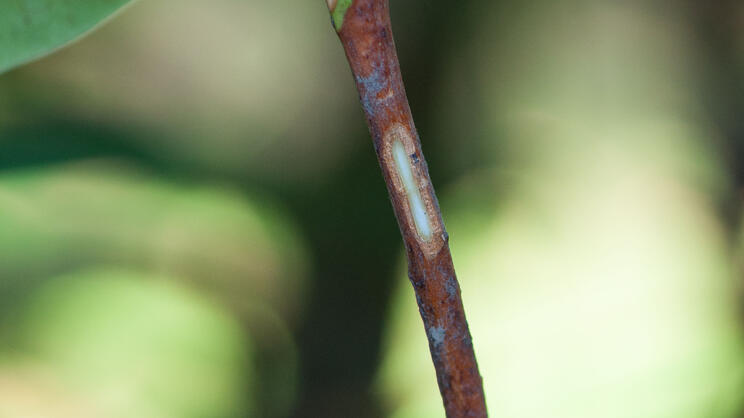
The wound should be about two centimeters long. This exposes the cambium, a layer under the bark that responds by forming wound tissue (callus), from which new roots will develop. The actual layering involves burying the wounded shoot section in humus-rich soil. Enrich the soil with leaf mold if needed.
Step 4: Layer the Rhododendron Shoot
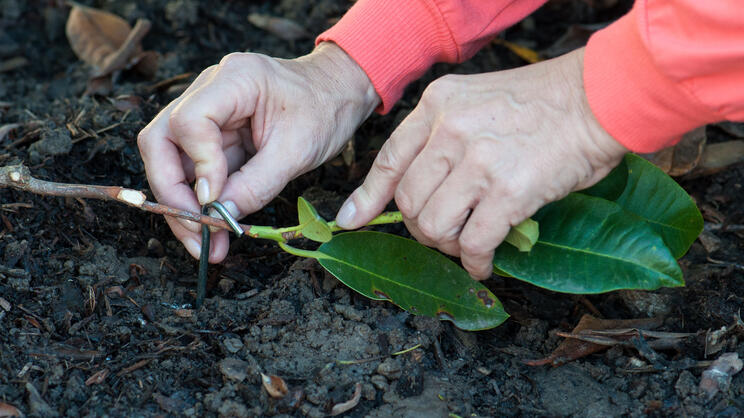
Dig a shallow trench and secure the shoot in it with a tent peg or wire hook. The wound should be in good contact with the soil.
Step 5: Secure the Shoot
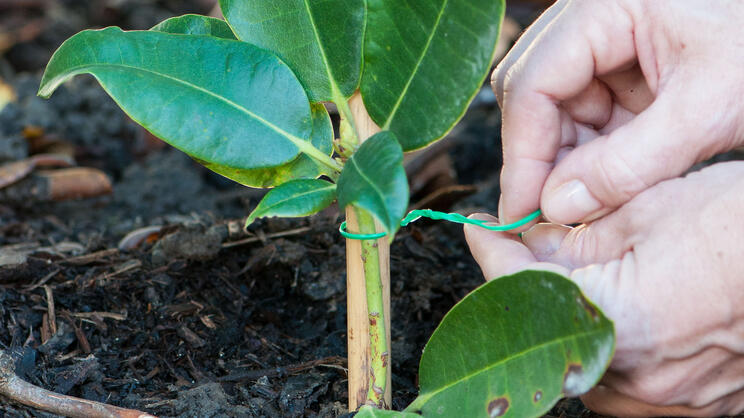
To ensure the new rhododendron grows upright, you can secure the end of the shoot with a support stick after layering. Use a bamboo stick to gently guide the shoot tip upward. Important: Make sure the binding material doesn’t constrict the shoot.
Step 6: Cover the Trench with Soil
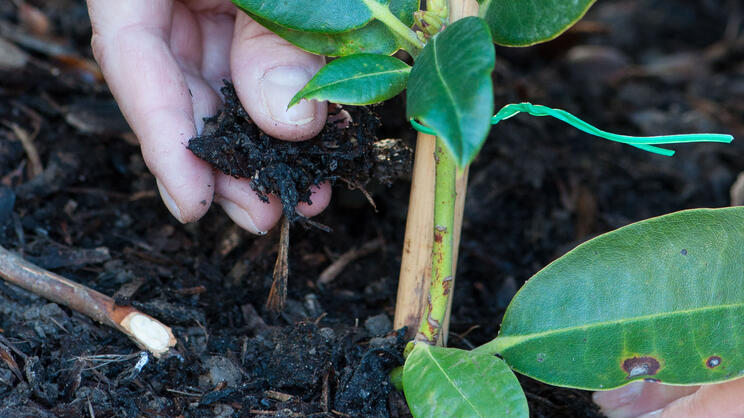
Fill the trench back in with potting soil or humus so that the shoot is well covered. Water the layered shoot with rainwater if needed and ensure the soil in that area doesn’t dry out.
By winter, the layered shoot will have rooted. Leave it attached to the mother plant until spring, and separate it around April. Use a sharp spade and leave some space around the young rhododendron to avoid damaging the roots. Carefully dig up the separated shoot and plant it in a new location with humus-rich soil. Remove any flower buds and possibly shorten the shoot tip to encourage branching. Water the young plant thoroughly so it establishes well.
Seeing a new rhododendron grow from a shoot I layered myself was incredibly satisfying. Not only did I expand my garden, but I also learned more about the plants I love. Propagation by layering might take some patience, but the results are well worth it. If you’re as passionate about rhododendrons as I am, give it a try—you might be surprised by how rewarding the process can be.

