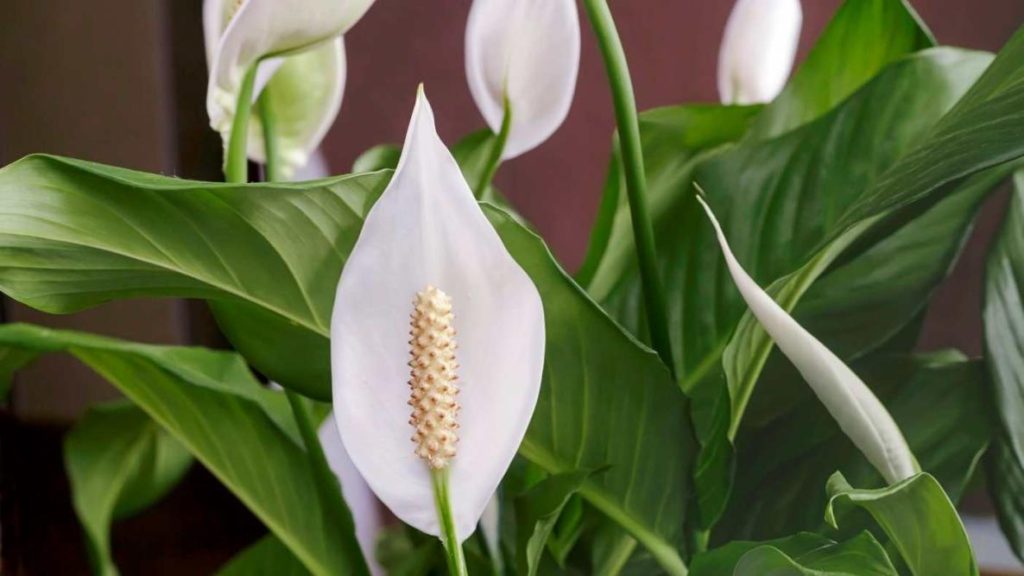
Peace lilies (Spathiphyllum) can thrive in bathrooms under the right conditions, making them a popular choice for this location in many homes. Here’s why peace lilies can do well in bathrooms:
- High Humidity: Bathrooms typically have higher humidity levels due to showers, baths, and sinks. Peace lilies, which naturally grow in tropical rainforests, appreciate the increased humidity, as it mimics their native environment.
- Indirect Light: Bathrooms often have filtered or indirect natural light, which is ideal for peace lilies. They don’t like direct sunlight, and the low to moderate light conditions found in many bathrooms suit them well.
- Cleaner Air: Peace lilies are known for their air-purifying qualities. Placing them in a bathroom can help improve air quality by removing common indoor pollutants such as formaldehyde, ammonia, and benzene.
- Moisture: The bathroom environment can provide peace lilies with consistent moisture, which they prefer. However, it’s important to avoid overwatering and ensure that the pot has good drainage.
Despite the benefits of placing a peace lily in a bathroom, there are a few considerations to keep in mind:
- Light: While peace lilies do well in low to moderate light, they still need some indirect light to thrive. Ensure the bathroom has a source of natural or artificial light to support their growth.
- Temperature: Avoid exposing peace lilies to extreme temperature fluctuations. Bathrooms can become chilly, especially in the winter, so make sure the plant isn’t subjected to cold drafts or significant temperature variations.
- Limited Space: Bathrooms can be limited in space, so choose an appropriate-sized pot that fits well in the available area.
In summary, peace lilies can thrive in bathrooms with the right balance of humidity, light, and care. Just be mindful of their specific needs, and your peace lily should do well in this location.
Contents
Should I cut the brown tips off my peace lily?
Trimming or cutting the brown tips off your peace lily’s leaves is a common practice and can improve the plant’s appearance. Brown tips can develop due to various factors, including dry air, over-fertilization, or inconsistent watering. Here’s how to go about it:
- Assess the Extent: Before pruning, examine the plant to determine the extent of the browning. If only the tips of a few leaves are affected, you can trim those areas. However, if the majority of the leaves have extensive browning, it’s essential to address the underlying issues causing this problem.
- Use Clean Tools: Ensure your pruning shears or scissors are clean and sharp. Clean tools help prevent the spread of disease and make clean cuts.
- Trim Gently: Trim the brown tips, following the natural shape of the leaf. Make a diagonal cut to mimic the leaf’s tip, which can give it a more natural appearance.
- Don’t Overdo It: Avoid cutting too much of the leaf, as it can stress the plant. Trim just the visibly browned areas.
- Address Underlying Issues: Trimming the brown tips is a cosmetic solution. To prevent future browning, address the factors causing it. Ensure the plant is not exposed to dry air, maintain consistent watering, and avoid over-fertilization.
- Regular Maintenance: Periodically check your peace lily for new brown tips, and trim them as needed to keep the plant looking healthy and vibrant.
Trimming brown tips won’t harm your peace lily and can improve its appearance, but it’s equally important to address the underlying issues that led to the browning in the first place to maintain the plant’s overall health.
What happens if you cut all the leaves off a peace lily?
If you cut all the leaves off a peace lily (Spathiphyllum), it can be a drastic measure with potentially serious consequences for the plant. While peace lilies are resilient and can recover from stress, removing all of their leaves is highly stressful and can severely impact the plant’s health. Here’s what can happen:
Shock and Stress: Cutting off all the leaves will shock the plant and subject it to extreme stress. This can weaken the peace lily and make it more susceptible to diseases and pests.
Loss of Photosynthesis: Leaves are essential for photosynthesis, the process by which plants convert light into energy. Without leaves, the plant loses its ability to produce energy, which is crucial for growth and overall health.
Reduced Air Purification: Peace lilies are known for their air-purifying properties, and removing all the leaves eliminates this benefit.
Recovery Period: If the plant survives, it will need an extended recovery period. New leaves will eventually grow, but this process can take months. During this time, the plant may appear sparse and less healthy.
Risk of Failure: In some cases, a peace lily may not recover from such a drastic measure and may eventually die.
Cutting all the leaves off a peace lily should be avoided except in extreme situations, such as when the plant is severely diseased and all other measures have failed. It’s generally better to address issues affecting the leaves (like browning tips) while maintaining a healthy root system and allowing the plant to recover naturally. If you need to prune, it’s advisable to trim selectively and maintain some foliage to support the plant’s recovery.
How do I know if my peace lily is overwatered?

Determining if your peace lily is overwatered involves observing the plant and its pot, as well as checking the soil. Here are some signs and symptoms that may indicate your peace lily is receiving too much water:
Yellowing Leaves: One of the most common signs of overwatering is yellowing leaves. If the older leaves at the bottom of the plant turn yellow, it may be a sign of excess moisture.
Wilting and Drooping: Paradoxically, overwatered peace lilies can also display symptoms similar to underwatering, such as wilting and drooping. The roots become waterlogged and cannot absorb oxygen properly, leading to wilting.
Brown Tips: Overwatering can lead to brown tips on the leaves. However, this can also be a sign of other issues, so consider it in conjunction with other symptoms.
Root Rot: Check the roots by carefully removing the plant from its pot. Overwatering can cause root rot, which is characterized by brown, mushy, or foul-smelling roots.
Mold or Algae Growth: Excessive moisture in the soil can lead to the growth of mold or algae on the soil surface. This is a clear sign of overwatering.
Soil Moisture: Stick your finger or a moisture meter into the soil to gauge its moisture level. If the soil feels consistently soggy or wet, it’s a sign of overwatering. Peace lilies prefer the soil to be evenly moist but not waterlogged.
Water Accumulation: If there is standing water in the saucer beneath the pot, it indicates that the plant is not draining properly, which could be due to overwatering.
If you notice several of these signs and symptoms in your peace lily, it’s important to take action to address the overwatering issue. Allow the soil to dry out between waterings, ensure the pot has good drainage, and consider repotting if root rot is present. Adjust your watering schedule to meet the plant’s actual needs to prevent further overwatering.
How do you save a dying peace lily?
Saving a dying peace lily (Spathiphyllum) requires a combination of actions to address the specific issues affecting the plant’s health. Here’s a step-by-step guide to help revive a struggling peace lily:
- Assess the Plant’s Condition: Examine the plant closely to identify the specific problems it’s facing. Look for signs of overwatering, underwatering, pests, or diseases.
- Trim and Prune: Trim away any dead or yellowing leaves and stems. This helps redirect the plant’s energy to healthier parts.
- Repot if Necessary: If the plant is root-bound, showing signs of root rot, or if the soil is depleted, consider repotting the peace lily in fresh, well-draining soil and a slightly larger pot. Trim away any damaged or rotting roots during repotting.
- Adjust Watering: Water the plant thoroughly when the top inch (2.5 cm) of the soil feels dry to the touch. Ensure that the pot has proper drainage to prevent overwatering and root rot. Adjust the watering schedule to suit the plant’s needs.
- Improve Drainage: Ensure the pot has adequate drainage holes to prevent waterlogged roots.
- Increase Humidity: Peace lilies appreciate higher humidity levels. Increase humidity by misting the plant regularly, using a humidifier, or placing a tray of water and pebbles near the plant.
- Fertilize Carefully: Avoid fertilizing the plant until it shows clear signs of recovery. When it starts to grow actively, use a balanced, water-soluble fertilizer at half the recommended strength.
- Pest Control: If pests are present, treat the plant with natural remedies like neem oil or insecticidal soap. Wipe the leaves with a damp cloth to remove dust and potential pests.
- Proper Lighting: Place the peace lily in a location with bright, indirect light. Avoid direct sunlight, which can scorch the leaves.
- Stable Environment: Keep the plant in a stable environment, avoiding temperature fluctuations and drafts.
- Monitor Progress: Regularly check the plant’s progress and adjust your care regimen as needed. Reviving a peace lily may take time, so be patient.
- Root Health: Carefully inspect the roots and remove any mushy or damaged sections. Dust the cut ends of the roots with cinnamon to help prevent fungal issues.
- Encourage Air Circulation: Position a fan on low speed nearby to improve air circulation and prevent stagnant, humid conditions.
- Isolate the Plant: If you suspect a contagious disease, isolate the plant to prevent it from spreading to other houseplants.
Remember that it may take some time for the peace lily to show signs of improvement, and not all issues can be resolved quickly. Keep a close eye on the plant’s progress and adjust your care regimen as needed to help it regain its health.

