Contents
- 1 1 how does worm composting work?
- 2 2 starting the worm box
- 3 3 what to put in it?
- 4 4 what should not go in?
- 5 5 optimal conditions and the fist test
- 6 6 air and love
- 7 7 food: how much and how often?
- 8 8 worm life facts
- 9 9 care
- 10 10 layers in the worm bin
- 11 11 harvesting the worm compost
- 12 12 harvesting tips
- 13 13 worm humus and worm tea
- 14 14 welcome co-inhabitants to help.
- 15 15 co-inhabitants as indicators
- 16 16 observe and wait for processes
- 17 Possible Difficulties And Their Solutions
- 18 flies in the worm box
- 19 Treatment with SF nematodes:
- 20 my worms break out!
- 21 the worms become fewer / form clusters
- 22 unpleasant odor
- 23 what to do in case of mold?
- 24 do my worms eat only organic?
- 25 what to do on vacation?
- 26 Author
1 how does worm composting work?
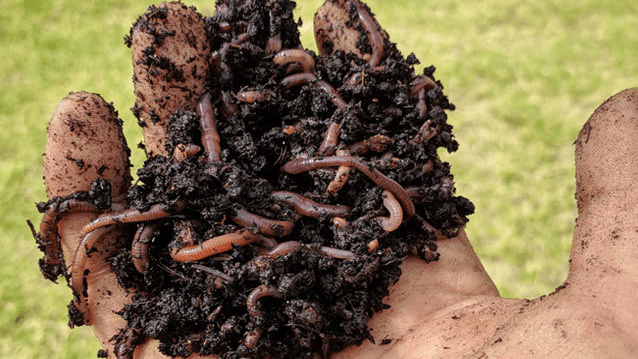
Microorganisms (bacteria & fungi) work with compost worms to decompose the organic waste. First, the MOs (=microorganisms) become active and break down the surface of the waste to multiply with the extracted materials. The compost worms have no teeth and suck on the fungi and bacteria. Thus, they digest the substrate, microorganisms as well as mineral additives and produce worm excrement from it, which gives a stable mass and looks like small crumbs. Worm excrement is nothing more than the finished worm compost or worm humus in miniature form.
Thus, 10 kg of organic waste becomes 1 kg of worm humus. This contains up to 7x as many nutrients as normal garden soil. By composting CO2 is bound again in the earth – so a worm box can save approx. 67 kg CO2 per year.

2 starting the worm box
Tear 1-2 sides of the packing carton and soak in water. Then put the compost worms together with the substrate into the box and gently mix in the wet cardboard. (The cardboard should not lie flat on the membrane – risk of clogging!) The box should now be almost half full.
Now spray water (0.4 liters) onto the substrate with a spray bottle to ensure sufficient moisture. Then cover with the hemp mat provided. It serves as a top layer to prevent desiccation and is lifted to feed the organic waste directly onto the substrate.
The harvest box (green plastic box) is used only after about a month (point 11.). If the compost worms are not from us, please make sure that enough substrate is added.
The worms have to acclimatize and should be fed only after 3 days. Likewise, the closed worm bin should be placed under a light source at night for the first 5 days to prevent isolated outbreaks.
3 what to put in it?
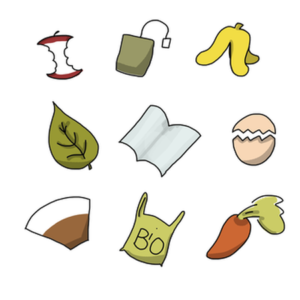
Raw, chopped and moist fruit and vegetable scraps, leaves (no nut leaves), eggshells (pulverized), plant scraps. Newspaper and cardboard (not glossy) also have an important role and should make up 20% of the food (volume). Worms need the fibers they contain.
Worms prefer their food cut into small pieces, because this increases the surface area and the leftovers can be better utilized. However, the food should not be mixed, because the compacted mass does not allow air to circulate. Worms love tea and coffee grounds. Especially with coffee grounds, care should be taken to crumble them if they have formed lumps. These could otherwise begin to mold. Coffee grounds should make up a maximum of 1/3 of the daily feed. Tea bags can be placed in the worm bin – provided they are free of micro-plastic.
4 what should not go in?
Worms are preferably raw food vegan. Also, foods with antibacterial properties should not be fed. Toxic, hard-to-digest and dry foods as well as bones, chemicals, dairy products, citrus fruits and peels, meat, bread and cereal products, glossy paper, cooked, marinated and salted food should not go into the worm bin.
The compost worms and microorganisms would either take a very long time to break these things down or perish from them. Feces/cat litter should not be added to the worm bin, as bacteria may not be broken down sufficiently. Heavily woody items/stalks/chips are very slow to digest, so we do not recommend adding them.
5 optimal conditions and the fist test
Don’t worry, compost worms are hardy and can take a beating. To keep your worms doing well for the long term, we recommend:
Sufficient moisture! This means the box contents should never dry out. The moisture content can be determined by the fist test: If you take out a handful of material, sort out the worms and squeeze it in your fist, some water should shine out between your fingers. If water trickles out during this test, it’s too wet.
The solution: mix in dry cardboard shreds, leave lid open during the day and temporarily feed less. If no water can be felt, it is too dry. The solution: moisten with an atomizer, squirt in with wet hands or add wet cardboard shavings.
When choosing a location, consider temperature and sunlight. Balcony or terrace is not a problem in spring and autumn. In summer and winter it depends on the temperature. Optimal temperatures are between 15°C and 25°C (extreme values would be 1°C or 38°C). Where you like to spend some time yourself is also a good place for the worm box.
The food is ideally a mixture of 80% organic waste and 20% cardboard shreds.
6 air and love
The worm composting process needs oxygen. Therefore, the worm bin has sufficient air holes. It is also important that the organic waste does not form too compact a mass. Therefore, the worm food should only be cut into small pieces and not mixed. The fibers of cardboard, paper or coconut (unfertilized) loosen up. It is also important to air the box regularly – it is best to open the lid of the worm box and remove the worm cup screen at the same time as you air your living space. As protection against flies you can hang a net or large cloth over it.
The inside of the lid should always be dry and not permanently damp. After the acclimation period, stay in contact with your worm inhabitants and observe the processes. In this way, changes can be easily recognized and, if necessary, any problems can be remedied at an early stage and without great effort.
7 food: how much and how often?
As an important basic rule here: When the top biowaste (2-4cm) is taken away, compost worms should be found just below. Then everything was done correctly. If there is odor, too much was fed!
The first 6 months are used to build up the microclimate in the worm home. Therefore, at the beginning it needs some time until the full feeding capacity is established. Start with 100g food/day. In small steps you can increase the amount of food. The worm population will gradually adapt to the amount of food.
Feeding can be done daily or a larger amount every third day. If there is less organic waste, this is not a problem either. One adult worm weighs about 0.4g. For the starting population, the live mass is 200g. Compost worms can digest half of their own weight every day.
8 worm life facts
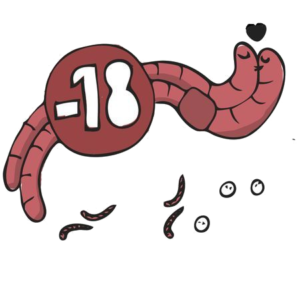
Compost worms are hermaphrodites. Sperm is exchanged during sexual intercourse and fertilization occurs when the ring, which is visible on the outside, is stripped off. The stripped ring contracts into a cocoon, from which the offspring hatch. In the best case, the worm population doubles every three months. Under optimal conditions, a compost worm can live up to 7 years.
9 care
The mineral mixture keeps the pH in the neutral range, as some food (e.g. coffee) would cause a rather acidic environment. It also provides the worms with necessary minerals for their well-being. Ideally, sprinkle 1-2 level tablespoons – depending on the level of the box – under the hemp mat every month (2-4 tablespoons/month for the family worm box). Start doing this 3 weeks after you start the crate. Attention: Do not overdose mineral mixture! If the mineral mixture runs out, it can also be temporarily replaced with powdered ground eggshells. In the longer term, we recommend the mineral mixture to prevent deficiency symptoms.
10 layers in the worm bin
The organic waste in the worm bin continuously decomposes into humus.
- The top layer consists of 2-4 cm of fresh organic waste.
- Immediately below, the worms are very active and begin their work.
- In the lower part of the worm bin is the finished humus. There is hardly anything left to eat and therefore only a few worms can be found.
11 harvesting the worm compost
- At the beginning, the worm bin will be almost half full due to the starting population.
- Approximately 1-2 months after the start, the harvest box (green plastic box) can be placed in the worm bin. It is then optimal if the edge of the harvest box is flush with the edge of the wooden box.
- To make it easier for the worms to migrate upwards, some substrate including worms (1-2 hands) can be placed from the wooden box directly into the harvesting box. From now on, the worms are fed into the harvest box. Hemp mat always lies on top. Important: Do not remove the harvest box now! The worms migrate upwards through the open bottom to the fresh organic waste.
- Later on, the material underneath the harvest box compresses and it sinks slightly. harvesting should then be done every 6 months. We recommend a spring/fall rhythm, as the humus can then always be used fresh in the garden. To harvest, the harvest box is taken out.
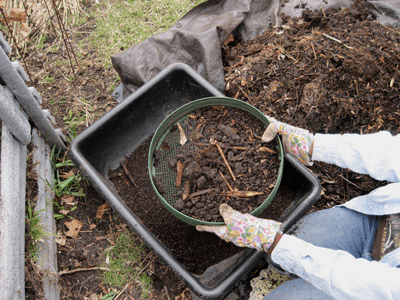
- Since the majority of worms always stay where there is fresh food, most worms are in the harvest box. The finished worm humus in the wooden box can be harvested by hand. After harvesting, the contents of the harvest box together with the worms can be emptied back into the wooden box. If the harvest box does not fit in afterwards, simply put some material from the wooden box into the harvest box. Do not push it in! Now the cycle starts again from the beginning.
12 harvesting tips
Sprinkle 2-3 tablespoons of raw polenta or flour three days before harvest. This will attract the last stray worms into the harvest box. If there are still a lot of worms in the bottom of the wooden box, this is a clear sign that the worm humus is not yet ready. Humus harvested too early will not have the optimal effect on your plants.
It is advisable to carefully clean the fleece of the membrane that separates the worm tea from the substrate each time you harvest to maintain permeability. It is best to use water and a very soft brush to clean the pores of the dark fleece from the top, removing fine particles. After harvesting, first unfertilized, soaked coconut fibers (as ph-neutral substrate) should be placed on the membrane, then the contents of the harvest box including worms. Finally, the box should be about half full again. In addition, damp cardboard can be mixed in, but this should not come into contact with the surface of the membrane, otherwise it may become clogged. Gently mix the entire contents for a quick restart. You can find suitable coconut fiber blocks in the online store.
13 worm humus and worm tea
Worm humus and worm tea are the optimal living fertilizer for your plants. They become more productive and resistant, so that aphids, mildew, etc. have less chance. The microorganisms help diligently in the box and eventually get into the worm humus and worm tea with bound nutrients.
The worm humus is mixed with soil in a ratio of 1:10 and can be used for your (young) plants or as growing soil. Humus can also be used to refresh old soil (1:5 – 1:10). If it is used as a fertilizer, it should be worked (superficially) into the soil. Worm humus in comparison with artificial fertilizers brings some advantages. The most important point is probably that no overdosing can take place. The plant takes only as many nutrients as it needs. To store the worm humus, place it in a sealable bucket. Make small holes in the lid to ensure gas exchange. As humus container is best suited, the green bucket in which the worms arrived with you. Important: the humus should not be stored for more than 4-6 months and should not dry out during this time.
Worm tea is called the excess liquid that is produced during the composting process and it is like an “energy potion” for your houseplants and vegetables. It is rich in nutrients and when used fresh it is also soil revitalizing as it is rich in live microorganisms. Dilute it with water in a 1:10 ratio and use it preferably as watering water. Otherwise, it can be stored in a (dark glass) bottle. To do this, put the worm tea in the bottle and make holes in the lid so that gas exchange can take place. As with worm humus, the fresher the more useful.
Worm tea or no worm tea? This is not a question because both are OK. Since worm humus can store 5x its own weight in water, it will absorb water for a very long time before releasing it. So a box with lots of humus on the bottom can be optimally moist and still no worm tea will come out. Rapid changes in temperature (heating periods, cold spells,…) can lead to short-term increases in worm tea. If the cup should be full to the brim every ten days, it is clearly advisable to keep the worm box drier – ventilation and an addition of dry cardboard will help here.
TIP: Compost tea can also be made with ready-made worm humus. To do this, simply dissolve some worm compost in liquid and use it as a liquid fertilizer a few hours later.
14 welcome co-inhabitants to help.
In addition to microorganisms and compost worms, there are other inhabitants in the worm home. They help with the joint composting process. All three co-inhabitants are important decomposers of organic waste.
Enchytraea: small white worms, 5-30 mm long. Their occurrence is very common. If there are more enchytrae than worms, the worm bin is too acidic. Remedy is an extra addition (max. 1-2 tbsp.) of the mineral mixture, then add it again regularly.
Woodlice: are the only land-living crustaceans, they have 14 legs and are basically important decomposers in nature. They appear rather rarely in the worm bin. If you don’t want them in the worm bin, you can remove them by hand.
Springtails: small white or black 6-footed insects, 1-5 mm long. Their occurrence is also very common.
15 co-inhabitants as indicators
Depending on the conditions in the worm bin, other co-inhabitants may
appear. Here is an overview:
Mites are important decomposers along with worms. 2-4 weeks after the start of the crate, one often notices a sudden increase in the number of mites, which regulates itself again within a short time. Later they tend to appear when it is very humid. By mixing in cardboard shavings and regular airing during the day, the humidity can be reduced. They like to occur in groups. The turtle mite usually collects at the corners. Vacuuming with a vacuum cleaner is possible. Mite is a very general term – with about 50,000 known species in 546 families, they are the most diverse group of arachnids. The two mites mentioned above, occur most frequently in the worm bin.
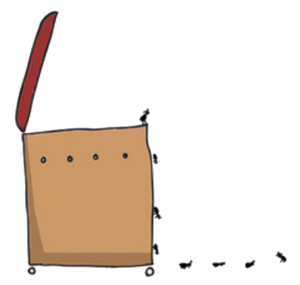
Ants: If the worm bin is outside, ants may migrate in. They are not a threat to the worms, but they are food competitors. The appearance of ants indicates that dry conditions prevail. The remedy is to introduce water with an atomizer. If the ants still do not want to leave, you can sprinkle a thick circle of cinnamon around the worm bin. The most effective way to do this is to follow the ant trail and spread cinnamon around it. It can also help to place the worm bin on a tray filled with water. This creates a barrier for the ants. If your worm bin does not have wheels, you can use cups, cans, wood, etc. for this purpose.
16 observe and wait for processes
A worm bin is an ecosystem with countless different processes and complex relationships. If you are unsure if the worms like a particular food, you can try it with a small amount in a corner and observe the process. How worms communicate with each other, why springtails appear in seemingly millions and disappear the next day – these are questions that not even worm researchers can answer.
If an inexplicable phenomenon occurs in the worm bin, it is best to observe it first:
What exactly can you see?
What causes could there be? e.g.: Change of location, food
What changes during the week?
Does the problem disappear or does it get bigger?
If you are unsure, you can stop feeding for a week and control the humidity – this stabilizes the ecosystem. Many problems will then solve themselves.
Possible Difficulties And Their Solutions
flies in the worm box
First, it is important to clearly identify the flies. You can find help for this in the FAQs. With flies, it is advisable to act quickly before there are really many!
Mostly fruit flies, as their eggs can be found on virtually any fruit bowl.
- Use hemp mat or a side of newspaper to cover – this is the best antidote and helps prevent.
- Feed organic waste right away. Bowls of fruit scraps are an invitation for fruit flies to lay eggs. If fruit flies are already circling the fruit bowls, then freeze for about 5h – this will kill laid eggs.
- Make an effective fruit fly trap, e.g. with vinegar. Instructions can be found on our website in our blog. Place one trap next to the fruit bowl and one directly in the worm bin.
- Bury fresh organic waste in the worm bin and add finished worm compost on top as a top layer. Possibly feed only vegetable scraps and no more fruit.
- Add some mineral mix to the box to stop the smell that the flies like so much.
- If there is an extreme fruit fly infestation, stop feeding for 1-2 weeks. You can also vacuum the flies with a vacuum cleaner.
- In colder temperatures, the worm bin can be put outside for a few hours – this will freeze the flies to the surface. The worms will migrate inside where it is still warm enough!
- Place organic waste in the refrigerator or freezer for a few hours to destroy fly eggs.
The natural task of these about 2 to 5mm small “black beetles” – which often hang together with their butts for mating purposes – is the decomposition of dead biomass, which makes them basically very useful. If they become too many, it is often a sign of waterlogging or excessive humidity in the box. In such an environment they can multiply very quickly, so act quickly! The following steps will help drive fungus gnats away or reduce them to tolerable levels:
Light infestation (up to 20 gnats visible when opening lid): attach yellow board to inside of lid (available at garden store). Wiping away the mosquitoes crawling around with a cloth or vacuuming significantly reduces the number.
Severe infestation (more than 20 mosquitoes): place the worm bin in the storeroom or basement for 1-2 weeks. Dilute Neem oil with water and place in a spray bottle (available from our online store). For 2 weeks, consistently spray sparingly twice a day directly on the flies on the lid and in the box (if the lid is covered with fabric, catch any dripping liquid so that the fabric remains dry).
The neem oil interrupts the reproduction cycle of unwanted larval infestations. The worms will not be harmed by the oil at this dilution.A temporary biowaste feeding freeze for this time will increase the effectiveness of the neem oil treatment. Additionally, the top layer of organic waste can be covered with a large sheet of newspaper or cardboard (also watch the corners and “seal”) to prevent larvae from escaping.
If potted plants are also infested, these must also be treated because of possible reinfection.
CAUTION: The use of neem oil increases humidity: counteract the increasing wetness in the box with cardboard snippet feeders.
Treatment with SF nematodes:
It is best to apply the light-sensitive nematodes early in the morning or evening. Add the SF nematodes to a small watering can with about ½ liter of water, stir, wait 5 minutes and stir well again. Meanwhile, put a few pieces of cardboard in the box in advance to soak up some excess water and empty the worm teacup again in advance. Now pour all the water with the nematodes into the worm box.
The small nematodes will gradually consume the fungus gnat larvae, so relief from the gnats will only be visible after days. If the infestation is very heavy, you can repeat the treatment after about 2 weeks. Most packages contain more than enough nematodes for 2 treatments, so feel free to split the purchased package. Store in a cool and dark place! The additional addition of water also increases the humidity in the worm box, best to counteract with pieces of cardboard.
Frost therapy: In colder outdoor temperatures (-5°C to +3°C), you can leave the worm bin outside overnight with the lid closed and open the lid for a few hours in the morning during daylight. The fungus gnats do not like cold and dry climate at all. Since this treatment is carried out only for a short time, in the meantime the worms have the opportunity to retreat downwards.
Last option: The most time-consuming option is to replace the soil (a coconut block can also be used for restarting) including worms. To do this, empty the worm bin, clean it thoroughly and let it dry. If you take your existing worm population, it is best to wash the worms briefly, so that no substrate with larvae is transferred to the new box.
my worms break out!
Generally this should not happen and indicates stress. Either it is too hot for them, too humid, too dry, the wrong or too much food or the worm bin has just been started. A reason can also be a change in the weather, which the worms feel. In this case it should not happen after a few days. To be on the safe side, check the seals. They don’t suffer shocks or vibrations well either.
the worms become fewer / form clusters
In an environment conducive to life, worms double their numbers every 3 months. So a reduction in numbers is unnatural and should indicate a problem. However, it could also be that your worms are just further down in the box, which would be their natural escape response to cold snaps, for example. It is best to read points 1-14 again carefully and consider whether you have done everything as described.
What indicates stress is when the worms form clusters in the corners with at least 20 or more. Since worms usually go to the surface to die and are decomposed there by the white mites, problems should be quickly recognizable for attentive users.
Waterlogging, improper feeding, or desiccation are the most common causes of reduced population. In rare cases, poisoning occurs due to too much protein in the food (grain or bread) – recognizable by the constriction of the worms and strong odor. Here it is best to counteract with cardboard shreds or coconut fibers. If the number of compost worms has already dwindled, you can also stimulate growth with a new starting population. Ask other worm bin owners if they have some worms to give away or order them from our online store.
unpleasant odor
Air must be able to circulate and water must be able to drain off in the worm box. If the water cannot drain away because, for example, the membrane is blocked or the substrate is too dense, waterlogging can form. The anaerobic conditions create putrefactive bacteria, which can have a very strong odor. So please check the membrane and clean it if necessary, carefully fold in dry cardboard snippets. By mixing the substrate oxygen will come back into the substrate and the smell should disappear quickly.
If too much has been fed and the worms do not keep up with eating, the biowaste may begin to stink on the surface and should be removed. This also applies if mold has formed, in this case the affected areas are removed. Info: white fuzz on the hemp mat is not part of this – it’s perfectly normal and okay.
mold worm composter
what to do in case of mold?
White mold may affect the hemp mat at the beginning, for example, as the microbiology still needs to establish itself. If other mold occurs, remove the moldy material and consider why exactly that piece may have become moldy.
If the wood of the box or the inside of the lid darkens, it doesn’t matter. This is a fungus that the worms themselves bring with them. The remedy is to wash it off with vinegar water. Then let it dry well with the lid open. The wood dries out and the mold is gone.
Fungi develop from spores. These can be found in the air and generally everywhere. In the worm teacup compartment below the membrane, fungal spores have an easy time at first and like to settle there because it is warm and moist. Please just remove them – either put them back into the worm bin/compost or into the residual waste. Once the microbiology in the box has developed further, fungi don’t really occur anymore – so just be patient. But please do not eat them.
eat my worms only organic conventional
do my worms eat only organic?
Compost worms can definitely handle food that has been treated with chemical pesticides. Compost worms are used to filter heavy metals and pesticide residues from sewage sludge. Worms accumulate up to 50 times higher concentrations of toxins in their bodies than are present in the environment. To some extent, they can also break down pesticides themselves. However, we recommend organic food – this way the worms are spared the poisoning.
vacation travel worm box worm composter
what to do on vacation?
A trip is coming up, but what to do with the worm bin? Our recommendation:
Under a week -> your worms don’t need extra care.
Under three weeks -> put food in for about a week, moisten well and mix with cardboard and newspaper scraps.
Over three weeks -> ask if friends or neighbors can check after about two weeks to put in organic waste and moisten the substrate with a pollinator. In any case, before leaving, put in food for a week and mix with cardboard and newspaper shreds. A cool location, such as a basement or bathroom, is optimal to prevent dehydration.
hemp mat cover worm box
24 Oh no – my hemp mat is perforated!
A good sign! The worms also love to eat the hemp mat and enjoy the perfect moisture in the mat, especially in the early months. The first 2 mats will therefore be gone faster than their successors. Also, because the microorganisms initially take a while until they have “pre-chewed” the first biowaste for the worms.
If no hemp mat is used, a page of newspaper can also protect the top layer of organic waste from fruiting. When a new layer comes in after a few days, please shred the old layer just as you would a discarded hemp mat. The worms love to take care of it. The tattering is important so that air can circulate well. New hemp mats and mineral mixtures are available in the online store under retrofit kits.


