Tomatoes are very sensitive vegetables, if you get too wet for a long time, blight can spread. The solution? A homemade tomato house protects the fruiting vegetable from harsh weather conditions, providing the plants with optimal conditions and you with a good harvest. In our step-by-step instructions you will learn how to build a tomato house yourself.
Contents
Why do you need a tomato house?
Tomatoes are a demanding vegetable. If they are exposed to too strong wind, they run the risk of dying. Rain can destroy the fruit by cracking the surface, and too much sunlight is not good for the plant.
As you can see, tomatoes are not planted “just like that”. So you need something to protect your tomato plants. Normal greenhouses can sometimes be very large or expensive. But to get a bountiful harvest, a conventional greenhouse isn’t absolutely necessary either. A smaller DIY tomato house also serves its purpose here. It provides:
- a sunny, warm place;
- a light breeze;
- protection from rain.
A south-facing tomato house also means that the air can circulate well inside. Midsummer temperatures can thus be balanced even better than in a greenhouse.
So here goes. Let’s build a tomato house!
How to build a DIY tomato house
Homemade tomato house is the ideal beginner project in the field of “DIY and garden”. It requires only a few tools and materials. Craftsmanship can be practiced on this project, as it does nothing if it is not 100% furniture quality. Basically, just a construction of square timbers with a stapled film is enough.
Preparations for the construction of a tomato house
Before you can implement your construction project, you need to make appropriate preparations. Pick a sunny spot in your garden and level the area. Plan so that the open side of the tomato house ideally faces south. Unless that is feasible, east or west will also work. The north should be avoided.With our step-by-step instructions, you will need just under 2m² of space in the garden. Here you can subsequently put four to five tomato plants.
You should adjust the height of the tomato house to the type of tomato you want to plant. In our example, we construct a tomato house with a height of 250 cm. So the plants have plenty of room to grow upwards in any case. Of course, you can build this for yourself lower.
Building tomato house: Tools and materials

The tools and materials required for this project are very manageable. You only need tools, which should be available anyway as a garden owner and passionate do-it-yourselfer.
To work on the ground you will need:
- Folding rule
- Spade
- Shovel
The tools for the construction of the tomato house:
- Sledgehammer
- Cordless screwdriver
- Spirit level
- Saw
- Tacker
The material used:
- 4 x ground sleeves (size: 61 x 61 mm)
- 8 x square timbers (58 x 58 x 2.500 mm)
- 2 x squared timber (58 mm x 58 mm x 1000 mm)
- 6 x square timbers (58 mm x 58 mm x 700 mm)
- 20 metal angles
- Film in sufficient quantity
- Stainless steel screws (alternatively: galvanized screws)
Step 1: Preparation of the soil
In the first step you will need the spade to cut the area where you want to build the tomato house. The footprint of our tomato house is 240 x 80 cm. Stake out this area with the spade, going about 7 to 10 cm deep. This creates a nice lawn edge and makes the area to be cut off more visible. You can now use the shovel to remove the soil.
Once this step is complete, the construction of the actual tomato house can begin.
Step 2: Drive in ground sleeves
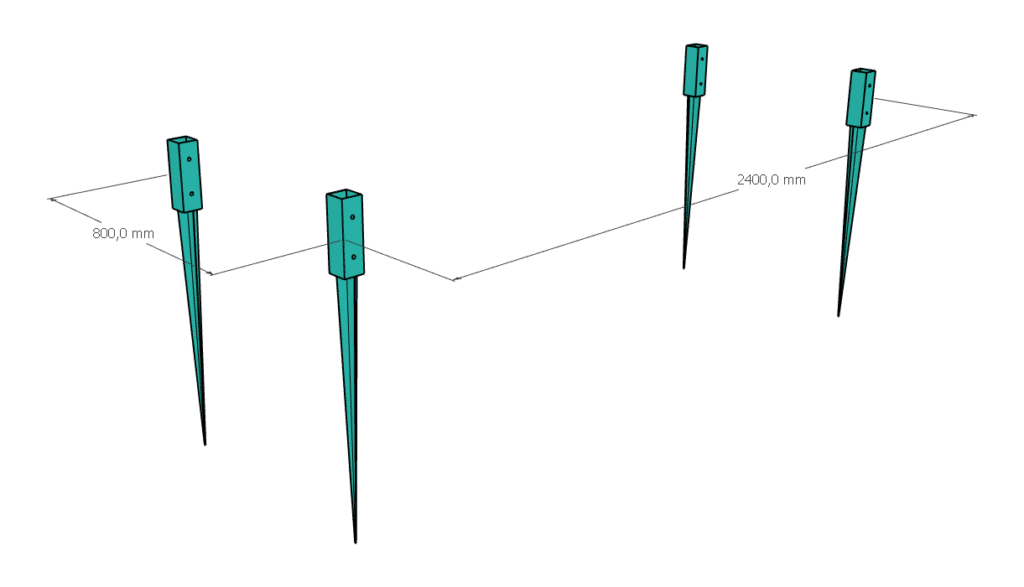
Saw off a small piece of one of the 250 cm long square timbers. This should be just under 1 cm longer than the receptacle of a ground sleeve. Now place a ground socket in one of the corners of the previously prepared ground. The sawn-off piece of wood goes loosely into the ground sleeve. With the help of the sledge hammer, the ground socket is hammered into the ground as gently as a sledge hammer can. Check again and again whether the sleeve still goes straight into the ground. If this is not the case, the sleeve must be taken out of the ground a little and straightened. The purpose of the previously sawed-off piece of wood is to prevent the ground sleeve from being damaged during hammering.
Repeat this step for all four corners and then check with a spirit level if all sleeves are at the same height. If you do not have a long spirit level, place a long squared timber on the ground sleeves and then place the spirit level on top.
Step 3: Build tomato house
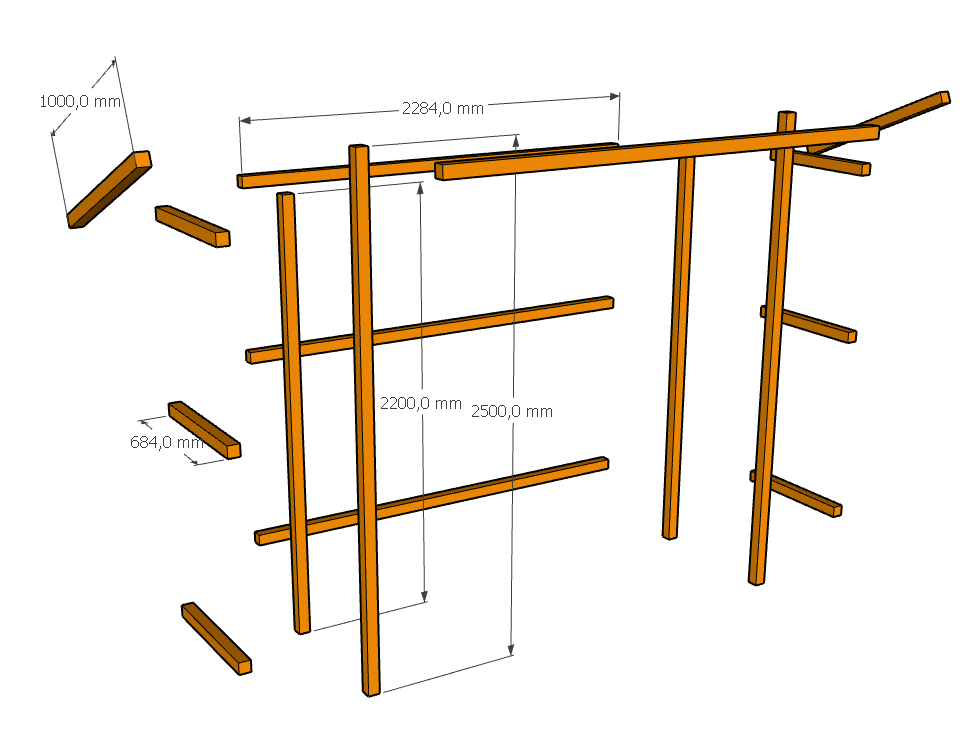
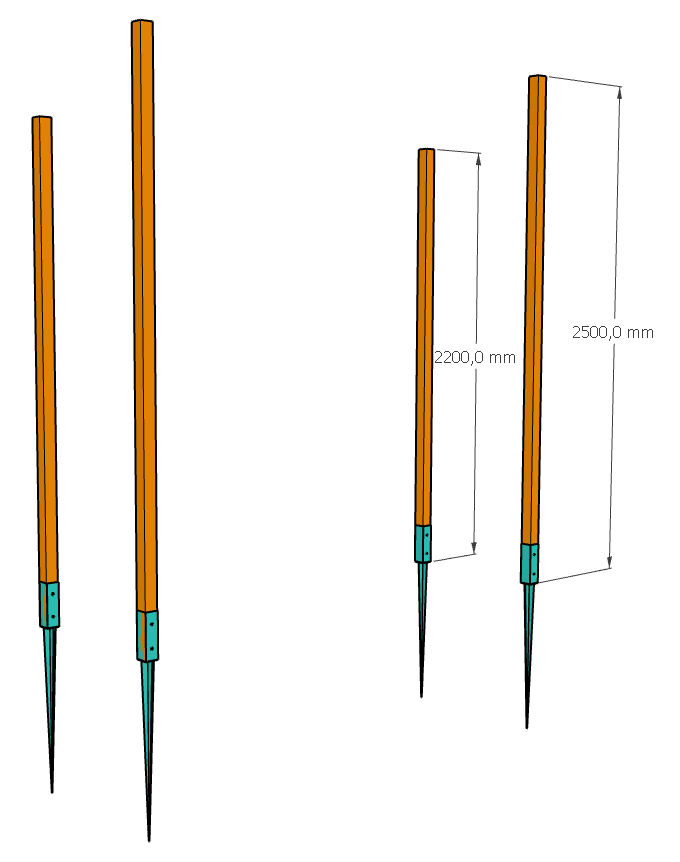
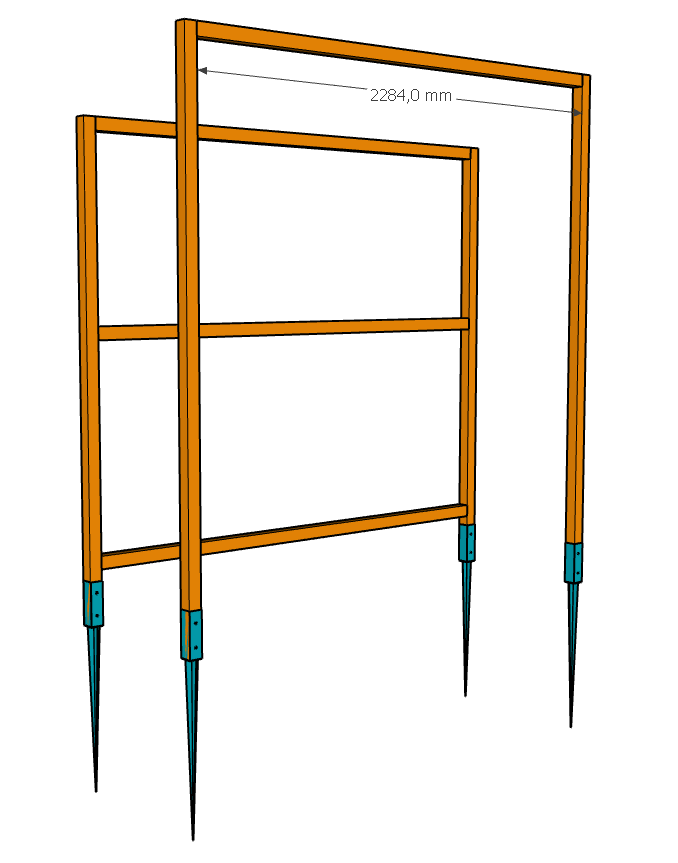
Place two of the 250 cm square timbers in the front two ground sockets. This will later become the open side where the access is located. Use a saw to cut the other two (250 cm long) squared timbers to 220 cm. These go into the rear two ground sleeves. This will give you a roof slope over which rainwater can better drain. Screw all the squared lumber to the ground sleeves through the holes provided.
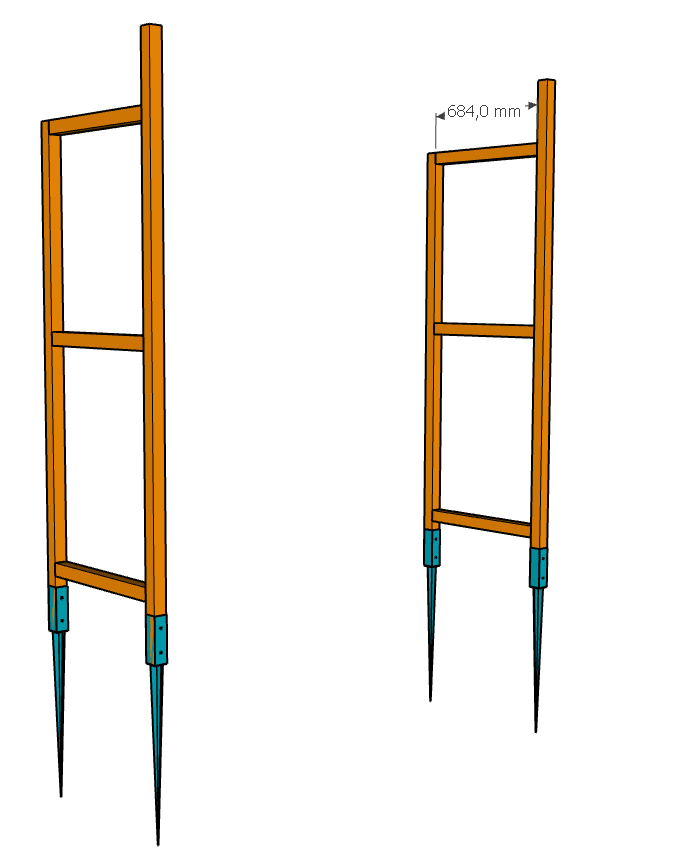
Shorten the 6 x 700 mm squared lumber to 684 mm. Connect the front posts, which are in the ground sleeves, to the rear posts. Three short squared lumber members per side: one at the top, one in the middle and one at the bottom. For fastening you can use the metal angles.
Cut the remaining 4x 2500 mm squared lumber to 2284 mm and use it to connect the two rear posts together on the long side. These are also attached at the top, middle and bottom. You attach another connecting square timber in the same way at the top of the front side.
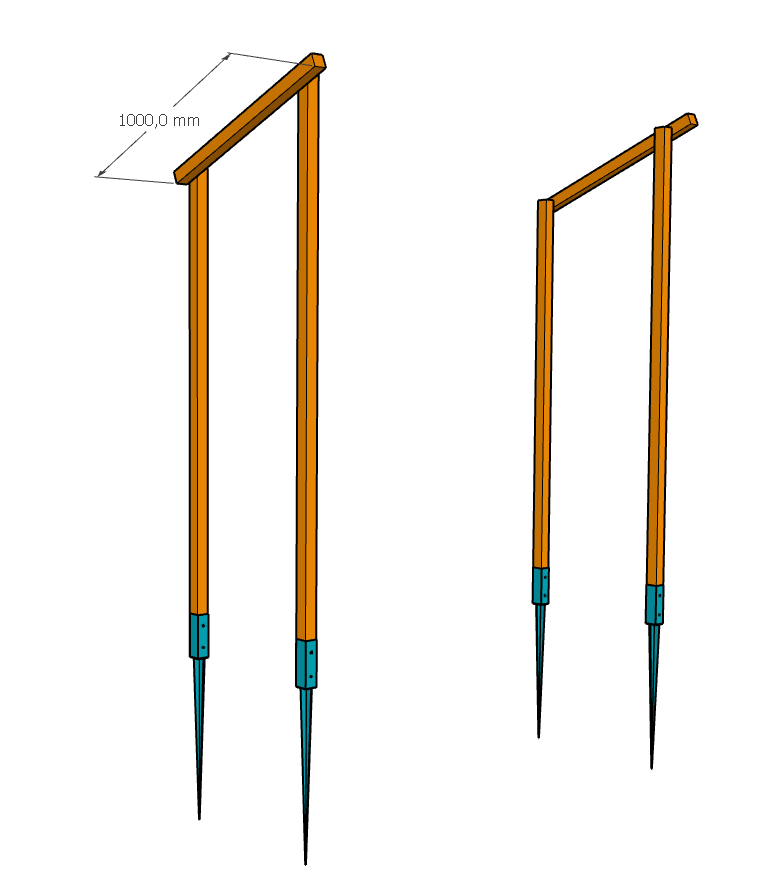
Now only the supports for the roof of the tomato house are missing. Attach them to the side of the main beams from front to back. This will automatically give you a slope when you attach the film in the following step.
Step 4: Apply the film

To complete the construction is still missing film. Here it is recommended to use a tear-resistant or reinforced film, which is suitable for greenhouses. Outdoors, the film must withstand wind and weather.
Fasten the film with stainless or stainless steel staples and a stapler. Cover both sides, the back and the roof completely with foil. Make sure that the foil is tight. The less it flutters in the wind, the longer the structure will hold to the square timbers.
Done!
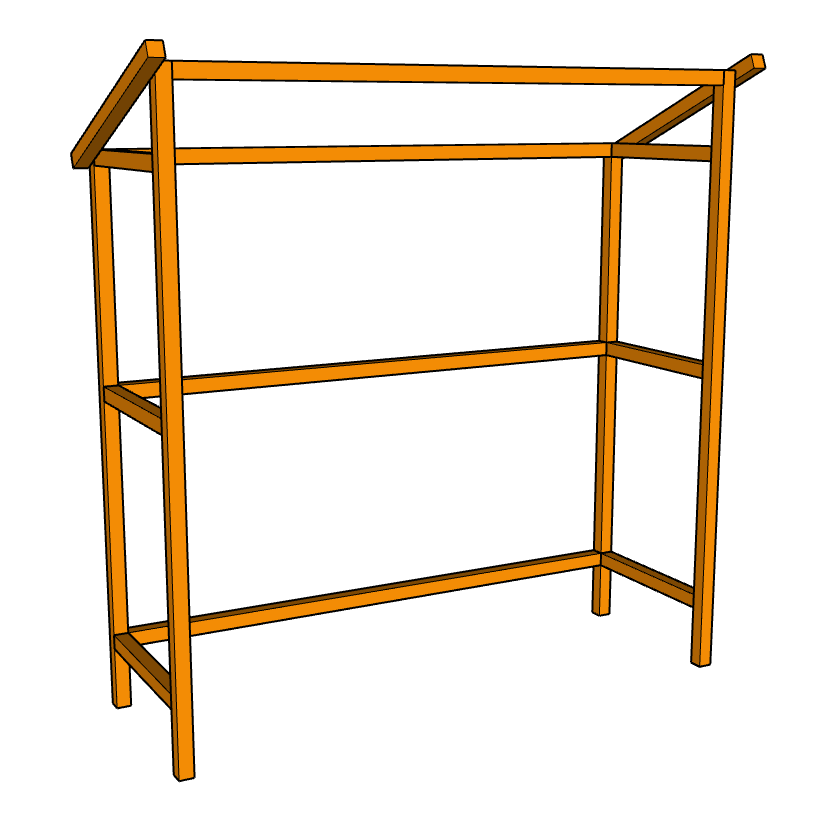
And that was it. Your tomatoes are now excellently protected and will hopefully bring you a bountiful harvest!
For a better overview, you will find an exploded view of your new tomato house below.
