Dethatching your lawn will keep it green and healthy longer! Unfortunately, this lawn care, which removes moss and lawn thatch and thus helps the grass roots to get more oxygen, is often neglected. Learn in our guide what to look for when dethatching and how to avoid mistakes.

Contents
- 1 Why should you scarify your lawn?
- 2 When should you dethatch your lawn?
- 3 How does a scarifier work?
- 4 Choosing the right scarifier
- 5 Scarify lawn: Step-by-step instructions
- 6 Step 1: Fertilize
- 7 Step 2: Mow twice
- 8 Step 3: Scarify the lawn properly
- 9 Step 4: Pulling off and loosening the soil
- 10 Step 5: Sow grass seeds
- 11 FREQUENTLY ASKED QUESTIONS
- 12 At what point do you need to scarify the lawn?
- 13 When is the best time to dethatch the lawn?
- 14 What do you do after scarifying?
- 15 Author
Why should you scarify your lawn?
Anyone who dreams of a lush green, well-kept lawn should dethatch their lawn regularly. Air-poor and heavy clay soils as well as shady lawns namely favor waterlogging and are therefore more susceptible to lawn thatch. These thick layers of moss hinder the supply of oxygen and lead to a lack of nutrients in the soil. If, on the other hand, you scarify your lawn in spring and fall, the lawn and its roots will thank you by growing back stronger and denser and by the absence of unsightly matted areas.
When should you dethatch your lawn?
You can easily tell if your lawn needs to be dethatched: To do this, pull a small metal rake or rake across the lawn and check to see if any manure residue or moss sticks to the tines. In addition, a heavy infestation of weeds, wood sorrel or moss also indicate that the grasses are inhibited in their growth and the oxygen supply to the lawn roots is impeded.
You can scarify the lawn from April to September. However, it is advisable to perform intensive lawn care in April or May, so that the greenery grows and thrives beautifully in the new season. Wait with dethatching until the temperatures come in slightly and the lawn starts to grow properly again. To regenerate, the lawn needs a few weeks of rest after dethatching. In summer, you should refrain from scarifying. You can still scarify dried-out lawns even in late autumn.
How does a scarifier work?
A scarifier has an axle or spindle that is installed horizontally in the scarifier. On this axle are blades that are fixed or rotate at short intervals. The motor causes the blade axis to rotate – thus slightly scoring the turf during dethatching, knocking out lawn thatch or moss.
Choosing the right scarifier
Manual scarifier
If you only want to scarify individual smaller areas of the lawn, you can use a hand scarifier. This has slightly rotating or rigid blades and requires more effort to use than a gasoline or electric scarifier.
Electric scarifier
For smaller green areas, electric scarifiers are perfectly sufficient. Since you usually do not scarify your lawn more than twice a year, you can overlook the slightly more complicated handling that comes with the power cord. However, very light electric scarifiers have the disadvantage that their blades can not properly scratch the turf. Our tip: Take a sandbag and use it to weigh down your scarifier.
Gasoline scarifier
For larger lawns, you should use a gasoline scarifier. Its heavier weight helps the blades cut sufficiently deep into the turf, even on dry lawns. Plus, you won’t have to worry about the power cord lying around.
Scarify lawn: Step-by-step instructions
Step 1: Fertilize
Before you scarify your lawn, you should fertilize it – preferably as early as mid-March. The daffodils will tell you when you can start: as soon as they bloom, the grasses will start to grow again. From this point on, your lawn can make good use of the nutrients you feed it with fertilizer.
Step 2: Mow twice
After fertilizing, mow the lawn once to normal height – about four centimeters. About two weeks later, you should reach for the lawn mower again and shorten it to two centimeters. After that, the lawn is optimally equipped with nutrients and prepared for the maintenance measure.

Step 3: Scarify the lawn properly
It is best to scarify the lawn in an imaginary checkerboard pattern. To do this, first drive across the surface lengthwise and then crosswise. But be careful: If you scarify one spot for too long, you will damage the turf too much. Therefore, drive the scarifier quickly over your lawn! The blades of your scarifier must never cut more than three millimeters into the turf. It is best to press the guide bar down when changing direction so that the blades are in the air.
Step 4: Pulling off and loosening the soil
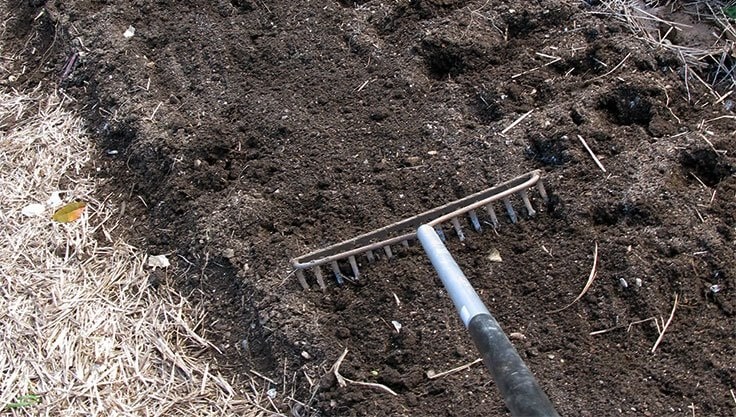
Thoroughly rake off loosened turf thatch after dethatching. To improve the air balance of lawns on heavy soils, you can spread a layer of building sand about two centimeters thick over the scarified area after the work.
Step 5: Sow grass seeds
If you notice bare spots after scarifying the lawn, you can sow new grass on them and then water the grass seeds well. Thanks to the rapid growth of grass in the spring, the traces after scarifying will no longer be visible after a few weeks. Also the weeds will have no chance to grow again.
FREQUENTLY ASKED QUESTIONS
At what point do you need to scarify the lawn?
Test with a metal rake that you lightly pull through the grass in your yard to see if any manure residue or moss sticks. If so, it’s time to dethatch the lawn.
When is the best time to dethatch the lawn?
The right time to dethatch your lawn is between April to September. However, if you use your backyard lawn a lot, either spring or early fall is recommended.
What do you do after scarifying?
After scarifying, you should reseed bare spots in the lawn and cover them with lawn soil to a height of about 0.5 cm. Water the area well so that the reseed can germinate.


