Last updated on October 23rd, 2023 at 08:55 pm
Children can spend hours outside, no matter what the weather. How about a homemade sandbox? Learn how to make a model with a bench and cover yourself in our DIY instructions. It’s best to take an afternoon to do this and have another person help you.
Material list:
Board type A: 2 pieces (2.6 x 19.2 x 145 cm)
Board type B: 2 pieces (2.6 x 19.2 x 141 cm)
Board type C: 12 pieces (1.9 x 11.4 x 148 cm)
Board type D: 4 pieces (44 x 74 x 23.6 cm)
Board type E: 4 pieces (44 x 74 x 42.3 cm)
Wood glue
8 hinges: 1.89 width
Hinge screws: 3.5 x 2.0 cm
wood screws: 4,0 x 5,0 cm
Wood screws: 5.0 x 9.0 cm for the square timbers
And this is how it is done:
- build a basic framework from the plank boards (type A+B), go with the shorter boards (type B) about 10 cm inwards.
- place the 12 boards of type C on the created base frame on a trial basis and make sure that the distances are even.
- Screw 2 boards (type C) to each side. The first board is screwed to the edge of the inserted plank (type B) for additional stability.
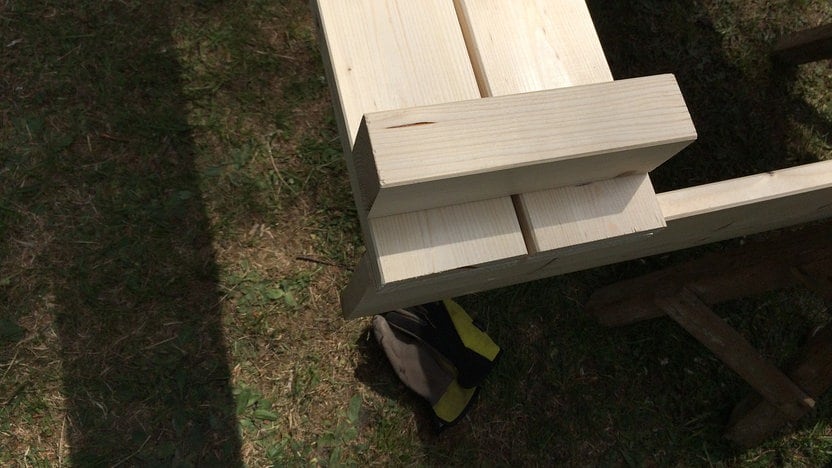
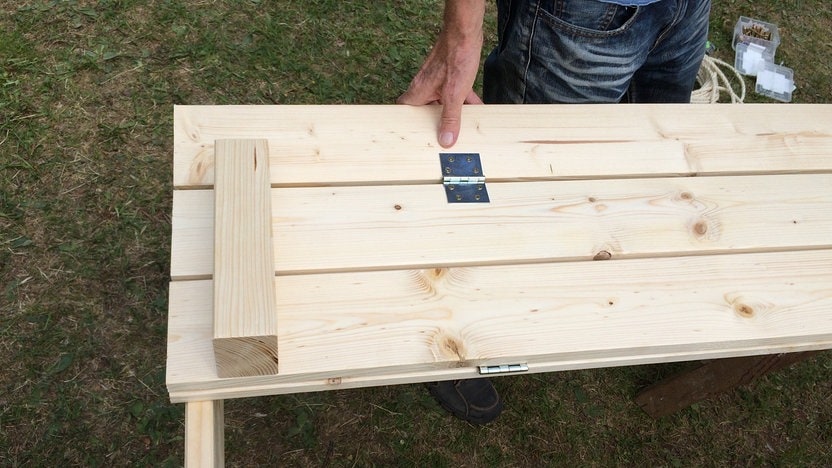
- for each side, assemble two boards together by screwing it to the shorter squared lumber (type D). Do not assemble flush with the squared lumber. The squared lumber should be offset approx. 3 cm to the inside. It will later serve as an armrest.

- assemble the board structures created in step 4 with the boards (type C) already mounted on the sandbox using two hinges each.
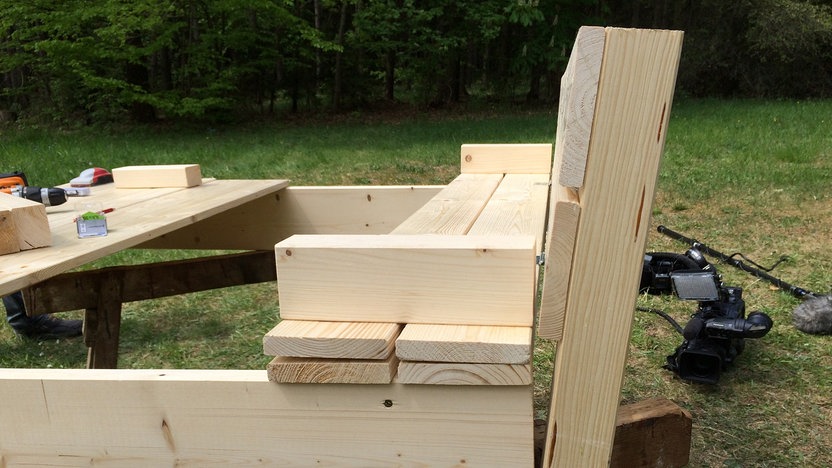
- For each side, screw two boards (type C) to the long squared lumber (type E). The overhang of the squared lumber will later support the backrest.

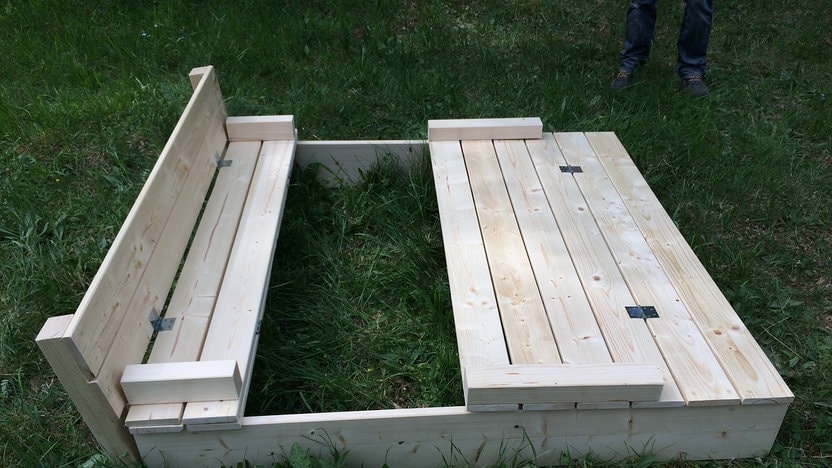
7 now unfold the already assembled boards and attach to the opposite side of the board the backrest created in step 6 with two hinges.

Ready is the sandbox with cover! Good luck with the reproduction and the children have fun playing.

Your sandbox needs a cover so that it does not get dirty or so that it is not abused by the neighbor’s cat as a litter box? It’s not such a difficult task, provided you have some handyman skills.
A sandbox cover is very useful to prevent dirt, leaves or unwanted sowing of plants. In addition, the cover extends the cleaning interval. There are three ways to protect the sandbox from dirt.
- Solid cover made of wood
- A tarpaulin or foil with elastic at the corners
- A net cover
While the tarpaulins and nets for the sandbox cover are available in stores ready to buy, we will deal with the construction of a solid cover made of wood
What do you need for this?
- Boards from the hardware store
- battens
- Wood screws
- Sandpaper
- impregnation against fungal and insect attack
- Glaze
- Foxtail or hand-held circular saw
This is how you should proceed
1 Make a construction manual or download it from the Internet. Calculate the necessary width and length.
2 keep in mind to leave a little space between the boards, so that there is sufficient ventilation.
3 the cover is made of planed boards, which are either screwed to two support boards, or to battens. It should completely cover the sandbox.
4 choose the support boards a little shorter than the boards of the cover, so the cover will later lock into the sandbox and can not slip.
5 have the boards cut to the right length at the hardware store or do it yourself.
6 First impregnate all the wood, including the ends, with wood preservative impregnation.
7 Drill the holes for the fastening and place the cover boards at the right distance from each other on the support boards. 9.
8 screw the outer boards to the support boards first, then fasten the rest.
9 now treat with the wood preservative stain and the cover is ready.
TIPS & TRICKS
You can also make the cover for your sandbox from two pieces. This makes it easier to put on and remove and takes up less space when you put it down


