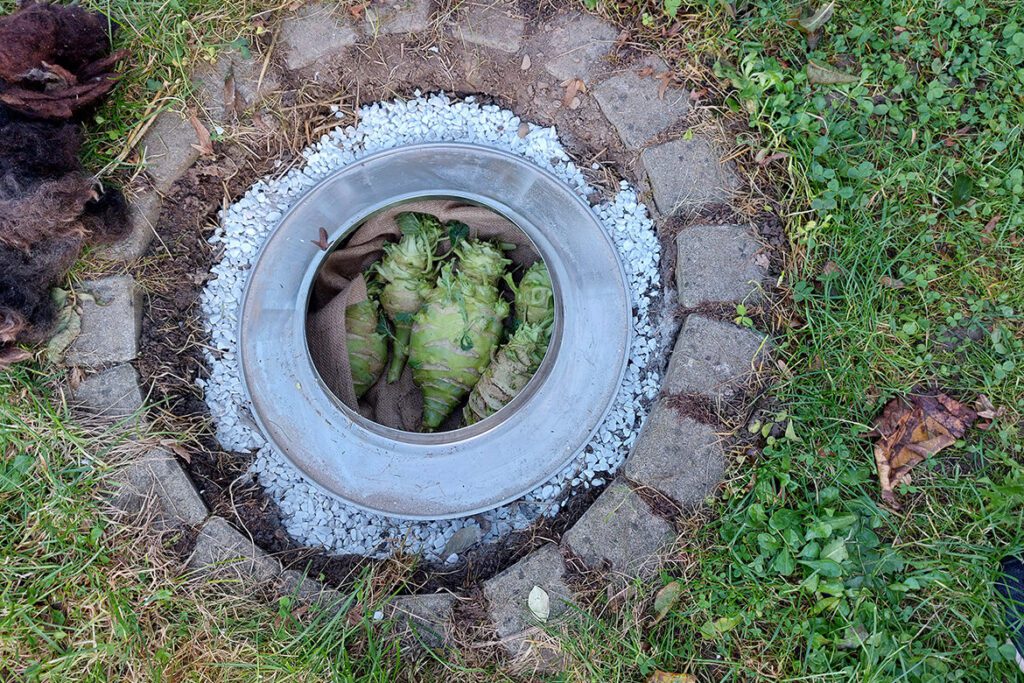
Our cellar, like most modern cellars, is far too warm to store vegetables, potatoes or apples. After hearing something about earth fridges or earth windrows in a report, I knew right away that we had to try it out. In fact, an earth fridge can be built with just a few utensils. We were completely convinced by the result – there are just a few things you should bear in mind. I’ll tell you what they are in the following.
Contents
What is an earth fridge?
Earth fridge or earth cellar. These terms ultimately all refer to the same thing. Ultimately, it is a pit in the ground that is about 40 to 50 centimetres deep. Vegetables from the garden that are not to be eaten immediately are placed there. This type of earth fridge dates back to the days when people didn’t have fridges to keep food fresh for longer. We have built an earth fridge with the help of a drum, but this is not absolutely necessary. Sand and straw or a few simple boards are enough.
Building an earth fridge: Which location is suitable?
Of course, the hole should be dug in the ground. But what do you need to consider when choosing a location?
The earth fridge should not be too far from the house. This will save you long journeys, especially in winter.
If you have a covered, rain-protected spot, that would be the perfect place. Here, the earthen refrigerator cannot fill up with water. Next to the garage, by the house or by the greenhouse, for example, is the ideal location.
If you do not have an overhang, make sure that the location is shady. The site should also not be in a hollow or at the bottom of a slope. Otherwise water will accumulate there and this in turn could lead to mould infestation of the stored vegetables.
You must be able to dig deep enough. Check whether the soil allows you to dig deep enough.
Instructions for a homemade earth fridge
Here you can download the instructions for the earth fridge as a PDF file.
What you need for an earth fridge
1 old drum from a washing machine or dryer (clean and rust-free)
Straw
1 bag of sand
1 wooden board to cover it
Spade
To build an earth fridge
Mark out the area to be dug. When digging, excavate an additional five to ten centimetres in depth and width so that there is still a drainage layer. Tip: You can save time and energy by using a soil auger. Appropriate models are available for a rental fee at the hardware store.
Cover the soil with a layer of sand two to three centimetres thick and tamp it down a little.
Place the drum in the pit and line the cavity with straw or coarse gravel.
A wooden board that is flush with the ground is suitable as a cover.
Building an earth fridge: Which vegetables are suitable for storage?
Basically, you should only store vegetables that do not have any damaged spots. Small rotten spots can spoil the whole stored harvest. Fruit and vegetables must be stored in separate earth bins. Apples should only ever be stored in their own pile or separated from other items with a layer of sand. Root vegetables such as carrots, turnips, kohlrabi and parsnips are best suited for storage. Potatoes can also be stored in the earthen store, as can cabbage. You must not wash the vegetables properly. They must be dry and can be roughly cleaned or freed of soil. But not too much, because the soil serves as a natural protective layer.
The right storage
You can now place the vegetables layer by layer in the bin and store them. Separate the individual vegetables from each other with sand and straw. Remove any leftover leaves beforehand, otherwise they may start to rot. Add another layer of straw on top and cover with the wooden board.
Build an earth fridge: Tips for the project
You can cut a circle out of an old piece of polystyrene and put it in the opening of the drum. This will give you extra insulation.
We were lucky enough to come across an old round road sign - the perfect cover for the drum. Just ask at a local building yard if you can get an old sign. But an old rain barrel cover can also be helpful to close the earthen fridge.
In the summer, the earth chest serves as a refrigerator for drinks. This way you can get cool beer and refreshing soda completely without electricity.
If you don't have a drum, simply dig a deep hole, line it with close-meshed wire mesh and store the vegetables directly in the ground hole. The wire mesh protects the vegetables from voles. With this variant, the drainage layer of sand should be even thicker.
You can also use a clean jute bag to separate the individual vegetable layers.
DIY earth fridge: Experiences
In the first winter we did not put enough straw between the vegetables. The vegetables probably got too damp and developed pressure marks. Maybe it was also due to leaves that we had not removed well enough. In addition, a few woodlice got into the vegetables. But that wasn’t too bad, there was still enough for us. We almost prefer to use our earth fridge in summer, as we don’t have a fridge in our allotment garden. This way we always have a place to store and cool bottles of drinks. Be brave and use this natural, great way to use the garden soil as a fridge!


