Transplanting a well-established rose bush can be a bit challenging, but it’s possible with the right preparation and care. Moving a mature rose requires careful planning to minimize stress and ensure successful relocation. Here’s a step-by-step guide on how to move a well-established rose:
1. Choose the Right Time: The best time to transplant a mature rose is during its dormant season, typically in late winter or early spring, before new growth begins. This timing minimizes stress on the plant.
2. Prepare the New Location: Before digging up the rose, prepare the new planting site. Choose a sunny location with well-draining soil. Amend the soil with organic matter, such as compost or well-rotted manure, to improve its quality.
3. Prune the Rose: Trim the rosebush back to about one-third of its original size. This reduces the plant’s top growth, making it easier to transplant and reduces stress on the roots. Remove dead or damaged canes and any weak growth.
4. Water the Rose: A day or two before transplanting, water the rose thoroughly to hydrate the roots and make the soil easier to work with.
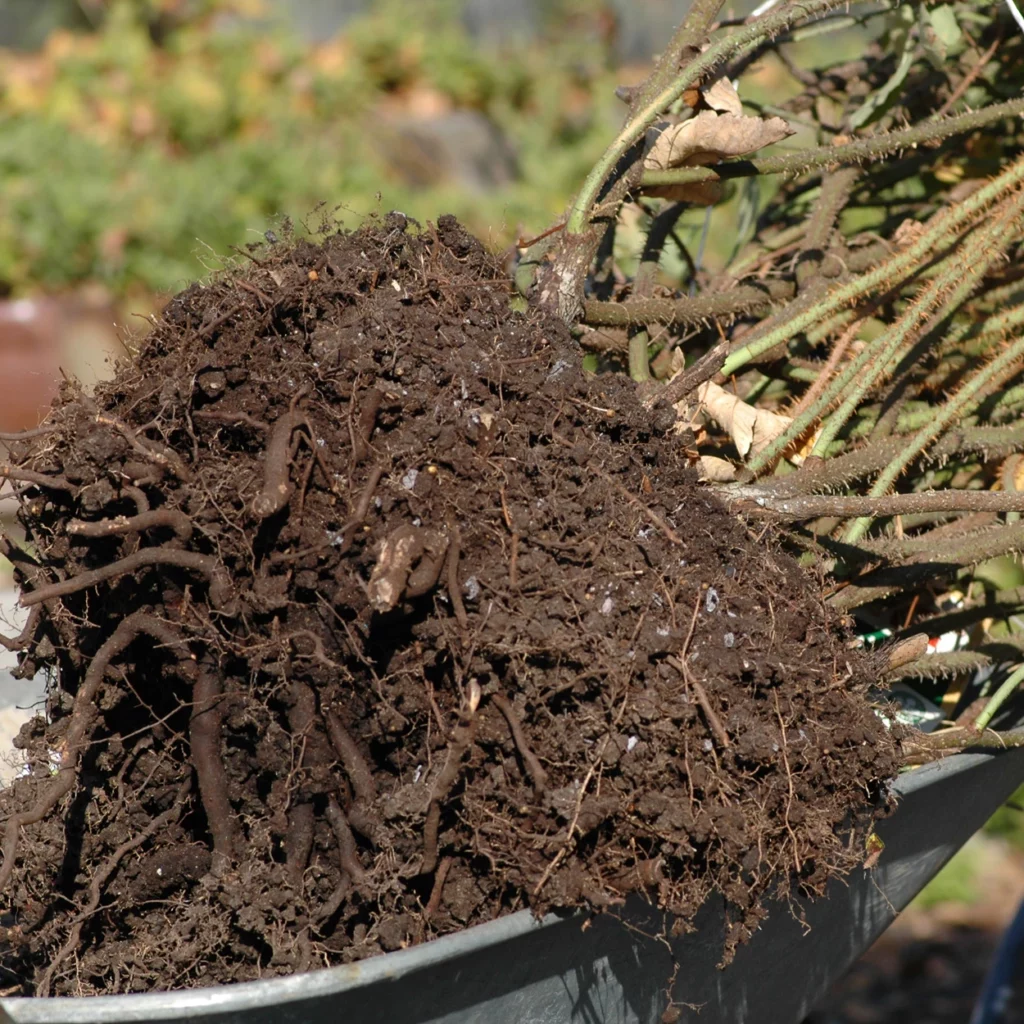
5. Dig a Proper Root Ball: To minimize root damage, dig a wide and deep hole around the rose, at least 12-18 inches from the base of the plant. The depth should be deep enough to reach below the root zone. Be gentle to avoid damaging the roots. Use a sharp spade or shovel, and keep the root ball intact as much as possible.
6. Lift the Rose: Gently lift the rose from the hole, ensuring the root ball stays intact. Carefully place the rose on a tarp or in a wheelbarrow for transportation.
7. Prepare the New Hole: In the new location, dig a hole that is slightly larger than the root ball. Make sure the hole is deep enough to accommodate the roots comfortably.
8. Plant the Rose: Place the rose in the new hole at the same depth it was planted in the previous location. Ensure that the bud union (the knobby part where the stems join the rootstock) is just above the soil surface. Fill the hole with soil, pat it down gently, and water thoroughly to settle the soil and remove any air pockets.
9. Water and Mulch: After planting, water the rose well to settle the soil and provide moisture to the roots. Apply a layer of mulch around the base of the plant to help conserve soil moisture and maintain a more consistent soil temperature.
10. Monitor and Care: Keep a close eye on the transplanted rose, especially during the first growing season. Water as needed, ensuring the soil stays consistently moist but not waterlogged. Fertilize the rose according to its specific needs, typically in spring, and continue to provide care and attention to promote healthy growth.
11. Prune Again: In the following dormant season, prune the rose to shape and remove any dead or weak growth. Continue regular maintenance to keep the rose thriving.
Moving a well-established rose can be successful with careful planning and execution. While the plant may experience some temporary stress, with the right care, it should adapt to its new location and continue to thrive, rewarding you with beautiful blooms.
Contents
Transplanting Roses: The right time to transplant
A rose is in growth from the first budding in late spring until well into the fall in some cases. Transplanting during this rather long period – that is, especially in summer – should be avoided if possible.
So when can you transplant a rose ?
There is a relatively short time window for transplanting. This opens depending on the weather in the fall from mid-October to early March in early spring and is also interrupted by ground frost.
The best time of year to transplant a rose is late fall and early winter. That is, the months at the end of the year before the ground is frozen. Then over the winter, the soil life around the root can establish itself and growth can begin directly in the spring.
preparation of the rose in the old location
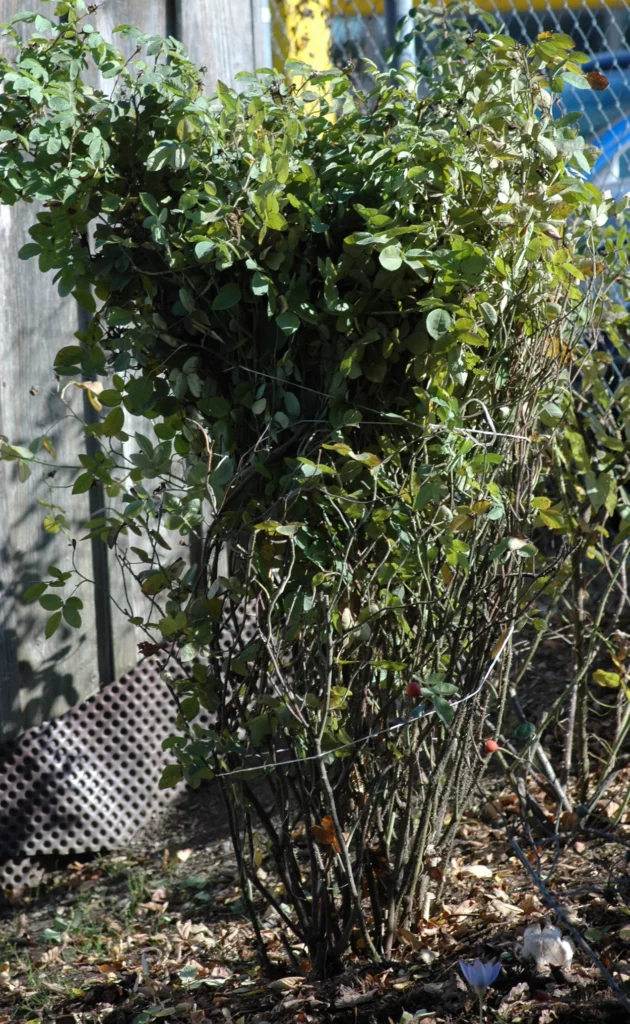
Still in the previous location in the ground, before digging the shoots of the rose are cut back only so far that it can be transported.
After cutting, it is recommended to tie the rose together. This will make it easier to dig out and handle.
Once the bush is prepared and there is enough space to work safely, the rose is dug out of the ground.
The task is therefore to preserve as much of the roots as possible and not to damage them excessively.
We remember, roses are deep-rooted. So it is enough to prick at a distance of 30-50 cm around the rose. The rose can be slightly tilted to the opposite side, if available by a second person.
If, when setting the vertical spades around the rose, a lot of its roots appear and are affected, they dig too close to the rootstock and should make the circle larger and start from the front.
If the shrub is free all around, it should be possible to see the main roots going down when you tilt the whole shrub. These should be cut as deep as possible. If possible, these often thick roots should not be bluntly damaged or torn.
Several courageous stabs with a sharp spade shovel from different sides lead to the goal.
Once the plant is free it can be transported to the new location. If a longer distance has to be covered, the root ball should be watered and, if necessary, packed or tied.
preparation of the new site
The planting hole at the new location should be large enough to accommodate the preserved root mass of the rose to be moved and leave enough room for the soil all around and downward.
If you have prepared the site before digging up the old rose and it turns out that its root ball is larger than expected, you should take up the spade again.
If you think that the new hole is big enough, you can put the rose in it to check. There should be enough space on all sides – also downwards – 20 cm are rather little but if it does not go otherwise sufficient.
Make sure that you get the rose into the soil with the desired planting depth. The grafting should in no case be above, it is better several cm below the edge of the hole.
Now mix the excavation of the new planting hole with loose planting substrate and, if desired, soil activator. This can be quite a lot, a wheelbarrow is a good mixing container.
plant the rose again

When everything is ready, the time has come – the rose can be replanted.
But before that, you should pay attention to the root system. The thick main roots are slightly cut, the fine hair roots are preserved as far as possible and not cut again.
At the bottom of the hole, they fill in several steps as much of the planting soil until the desired planting depth is reached. For control, the plant can be put in and taken out several times.
Once this is achieved, the edges are filled in, the cane should end up centered and as straight as possible by itself. Repeated compaction with the feet is possible and advisable. The new soil should not be too firm, but also not too loose.
finishing work – pruning and watering.
The transplanting of the rose is complete and a few final tasks remain.
If you have not already done so, prune the above-ground shoots now. In the end, much less remains than after an early pruning – that is, a maximum of one-third of the original growth height. Not only the length but also the number of main shoots – if there are enough – should be reduced. Old dead wood is also removed at the same time and, of course, the shape also plays a role. Overall, the result should be a thinned but harmonious picture.
This radical pruning ensures that the rose concentrates its forces on the formation of new roots. If too many and too long shoots remain, the plant is too busy at the beginning of the growing season to serve them.
After the roots have been severely damaged by digging and capping, it may not be able to fulfill this task from the beginning and ‘gives up’ or takes care of itself. Courage to cut is really called for in this situation.
Finally, and in case of drought also in the coming days, it is necessary to water well and thoroughly. We also recommend to form a watering edge for the further standing time.
If frosts are expected in the near future, you can also winterize the rose by piling it up and covering it.
Transplanting roses: after transplanting
Congratulations, your old established rose is now in its new location and there is nothing to do but wait until new shoots appear.
If you transplanted in the fall, occasional watering is recommended during extended dry periods and during bare frosts.
When new shoots start, a first check is due. After transplanting, this can take place somewhat later than usual and involve a nerve-racking wait. If one or more shoots are frozen back, cut them back to the healthy wood.
If, contrary to expectations, the rose does not sprout even in May, you should check with scissors or a knife whether the shoots are still green inside or completely dried out. If they are dry, cut them back gradually until life appears again – if necessary, even at ground level. Afterwards water well, the chances are good that even if there is not much left, eyes will still sprout from the grafting or shoots in the ground. If you have replanted a rose that is still growing and after a few days the leaves droop: This is normal to a certain extent, you should make sure it has enough water and possibly shorten it further.


