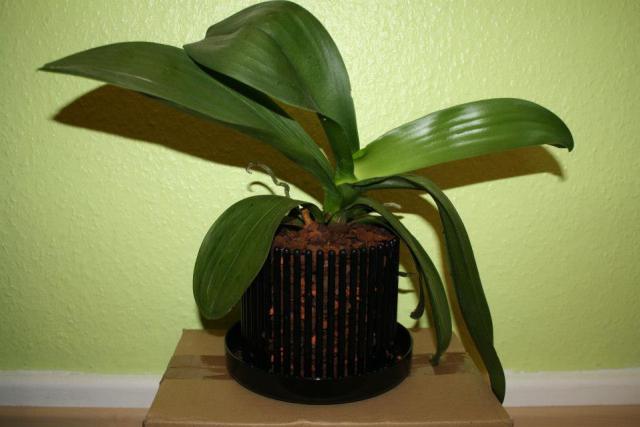
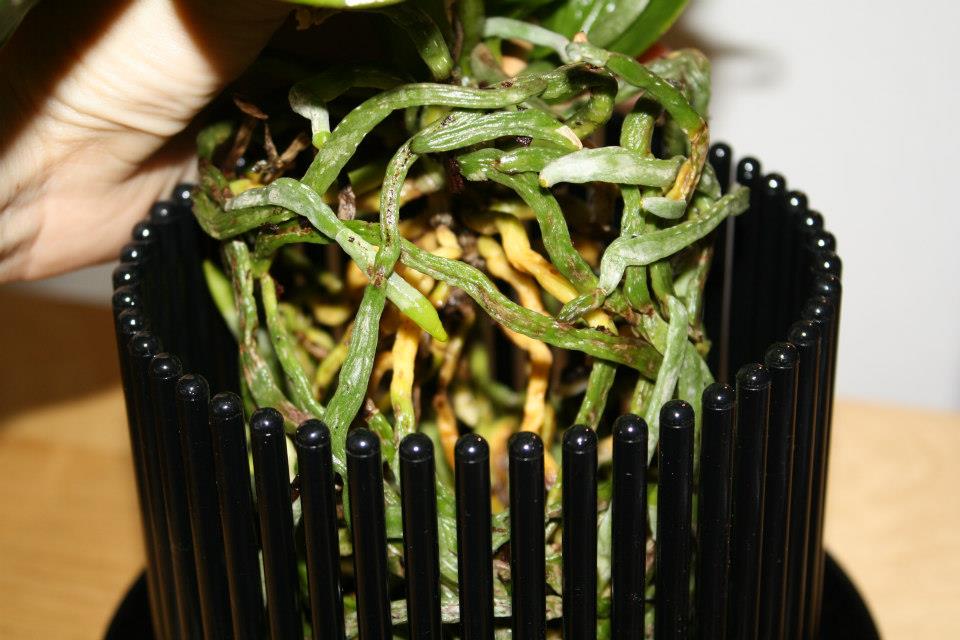
I will answer the most common question about repotting orchids right away: Orchids can be repotted at any time of the year. Experience has shown, however, that orchids in our latitudes cope particularly well with repotting in spring. With the rising temperatures and more light in spring, they can quickly form new roots and establish themselves in the fresh substrate.
As a rule of thumb, you should repot your orchid for the first time at the latest one year after purchase. After that, it needs fresh substrate about every two years.
Repotting orchids takes some practice, but it’s fun. Especially when everything is done and you can enjoy the result. I’ll give you a step by step guide in the following post, which will make repotting orchids much easier for you. In the pictures you can see a special orchid pot, the Orchitop (affiliate link*). Of course, the instructions work just as well with normal pots.
You can also repot flowering or budding orchids, contrary to many rumors. Especially multihybrids usually don’t mind. At worst, the flowers will wilt faster or the orchid will let its buds dry up. But I have rarely heard such complaints from my orchids after repotting :).
Contents
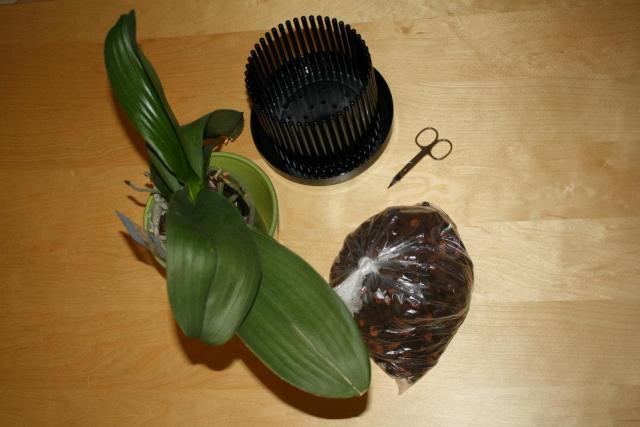
Repotting orchids – preparations:
- Cut open garbage bags and lay them out as dirt traps. Or, if possible, move the repotting to the garden or balcony right away.
- Have sharp scissors handy (sterilized if possible).
- Have fresh orchid substrate ready to use
- Have new plastic pots in various sizes on hand, just in case.
Step 1: Remove the orchid from the pot
To repot your orchid, you first need to remove it from its pot. Sometimes this is not so easy. Orchids with good root systems like to hold on to the edge of the pot with their roots or grow through the holes in the soil. It often helps to gently knead the pot with your fingers. This loosens the inside and the roots detach from the pot rim without major damage.
Once you have done this, carefully pull the roots that have grown through the holes in the bottom upwards out of the pot one by one. If this doesn’t work at all, or if the roots just won’t come off the pot, you can also use scissors and cut the pot open so that you can reach the roots. If the pot has only a few cracks, you can still use it again. Otherwise, use a new pot.
Alternatively, you can put the orchid in a water bath with the roots for an hour or more before repotting. This will make the roots more pliable and often easier to detach. It is best to try out how it works best for you and your orchids. Some orchids are very easy to care for and fall out of the pot almost by themselves.
Step 2: Remove the old substrate
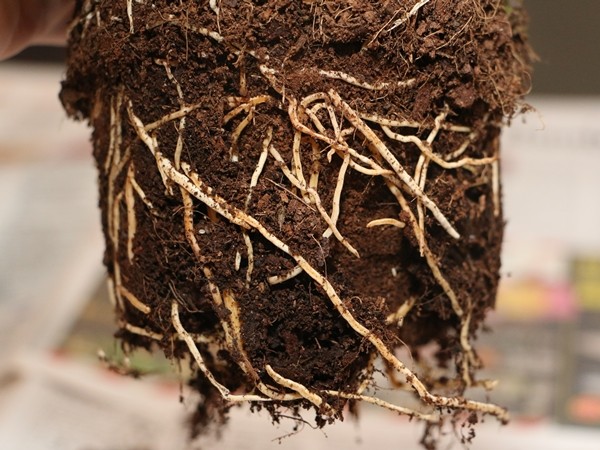
Once you have successfully removed the orchid and all of its roots from the pot, the second challenge awaits you. Now you have to remove the old substrate from the roots. Again, there are some specimens that drop it voluntarily. Quite a few, however, have their roots attached to the substrate. This in itself is not a bad thing, because it shows that the orchid has grown well and is stably anchored in the substrate.
Since it is now to get new substrate, however, this often not so delicate band must unfortunately be loosened again. Here, too, it is important to approach the matter with caution and to remove the adhering substrate pieces in such a way that, if possible, no root is broken. Unless the root has already dried out anyway, but more on that in step three.
If some substrate adhesions turn out to be real hardships that do not want to be removed at any price, they may simply remain on the roots in exceptional cases. The goal, however, is to remove as much old substrate as possible to make room for new substrate.

Step 3: Cut off dried up roots
Once step 2 is done we come to the pedicure for the orchids. If an orchid has been sitting in its pot for a long time, some or even many of the roots in the pot are sure to have died. This is quite normal at first and has something to do with aging processes.
You can recognize dead roots by the fact that they are either totally dried out or totally mushy. In the latter case it is possible that the orchid was watered too diligently or that the substrate was so old that it could not dry properly. It is therefore high time to repot.
To remove the roots, take a sharp pair of scissors – there are also special orchid scissors in the shops – and cut off all the dead roots piece by piece. The still vital, green or even silvery, plump roots remain on the plant and are maltreated as little as possible with the scissors.
If the shears accidentally land on an intact root, high-quality cinnamon will help. This has an antibacterial effect and protects against germs and pests that could otherwise penetrate the wound.
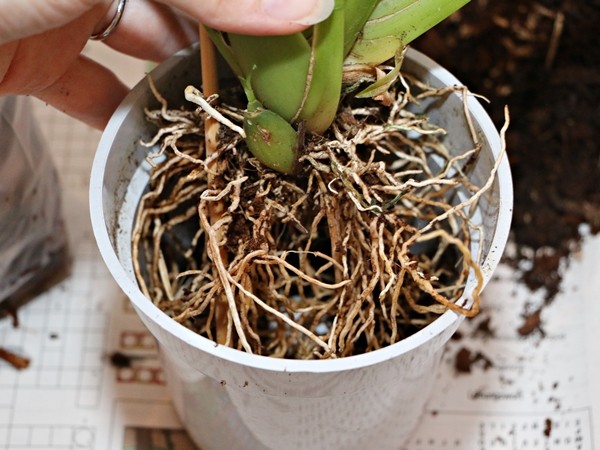
Step 4: Put the orchid back into the pot
Once all the dead roots are removed, the next step is to put the healthy roots back into the pot. Yes, that’s right, back into the pot means that you should put it back into the old pot. Of course you should clean it thoroughly with hot water and a brush.
A new, larger pot is really only necessary if the orchid has increased in root mass so much that the roots will not fit into the old pot even after pedicure. Or they just barely fit, but the new substrate has no more room.
In all other cases and in general: for orchids better to take a pot too narrow than too wide. The background is that with too large pots after watering the substrate can not dry quickly enough. And then there is the danger that the roots rot away. So remember: orchids like it tight in the pot.
And how do you get the roots back into the pot? I always put a layer of substrate in the pot first, as a base, so to speak. Then I put the ends of the roots into the pot and turn the pot steadily in one direction, so that the roots slowly but surely turn into the pot. I do this until all the roots are back in the pot and the plant itself is peeking out from the edge of the pot.
Sometimes the whole thing is a bit fiddly, but somehow so far all the roots have always come back into the pot. Here, too, you need to have patience and do not proceed with force, because then the roots break.
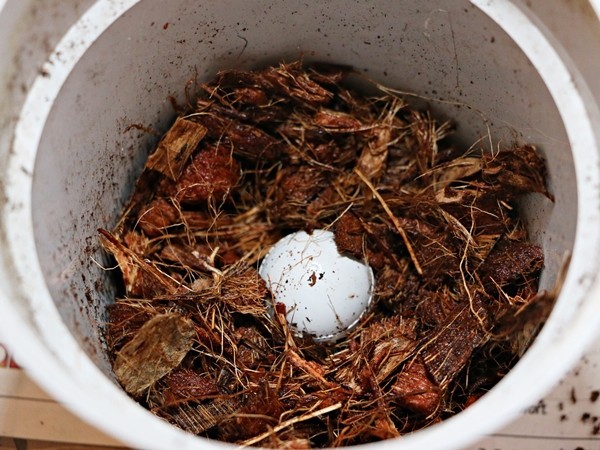
Step 5: Fill the pot with substrate
Now you are almost there. But one hurdle is still waiting for you. Of course, the orchid doesn’t want to sit in the pot with bare roots, but demands its fresh substrate. After all the stress, quite rightly, in my opinion. But there are already a lot of roots in the pot, so you can’t just dump the substrate in.
The trick: Put the substrate from the top into the pot and then tap the pot again and again lightly on the table or another surface, so that the substrate can trickle slowly from top to bottom. Repeat this process – i.e. filling the substrate from above and tapping it between the roots in the pot – until all the spaces between the roots are well filled with substrate.
Even if it seems laborious at first, success is achieved quickly and after a short time it is said: DONE – and a freshly repotted orchid beams at you and can go back to its place!
After repotting orchids:
Discard old substrate, because it is probably decomposed and enriched with salts from fertilizer. It is therefore no longer suitable, at least not for your orchid.
Do not water the orchid for several days to allow any “wounds” on the roots to close and prevent infection.
Enjoy the beautiful sight of a freshly repotted orchid and, if the orchid substrate is pre-fertilized, do not add fertilizer to the water for your orchids, which should be as low in lime as possible, for a month.
