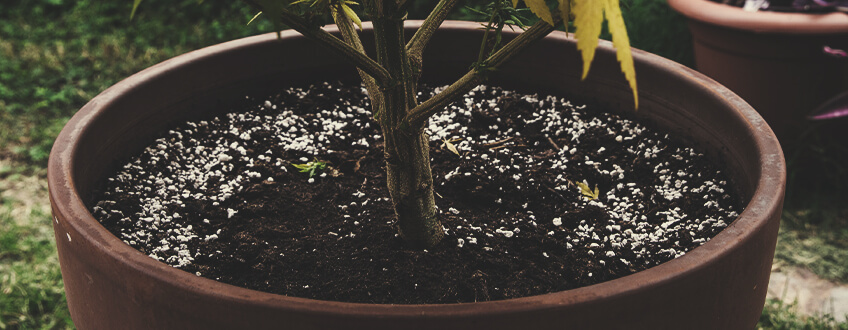
Reusing used soil saves money and improves its overall quality. Rehabilitating the old soil before reusing it when potting and repotting has a lot of benefits. Learn more about it here.
One step ahead
By keeping soil healthy from the start, you can prevent the need for radical rehabilitation before reuse. Regular fertilizing, composting and mulching of potted plants ensures healthy soil at every stage of life. If well-maintained soil retains its health, friability, water penetration and retention, it will need little reshaping when reused.
Co-planting also helps keep the soil healthy, vibrant and disease-free. If you dabble in coplanting, however, be sure to do it in a larger pot than necessary to give companion plants more room to grow. A simple alfalfa, clover or marigold will provide versatile benefits to keep the plants and soil healthy.
Old soil can be reused
Neglected and stressed soil needs a boost to be reused. Otherwise, it could become water repellent, its nutrients and minerals could be completely depleted, or its structure could break down completely. Soil that has dried out in the sun no longer has many nutrients and thus needs to be touched up.

Make sure to work clean
If your soil has been attacked by pathogens or it just looks unhealthy for some reason, the best thing to do is to put the soil in a garbage bag and throw it away. Pouring it into garden beds or adding it to compost can cause the pathogen to spread throughout your garden. Sometimes diseases can linger in the soil even when you thought they were gone. This is true for several types of mites, fungi, mosquitoes and rot. Reusing the soil will certainly infect its new occupant. Be sure to wash your hands before touching healthy soil and plants. Also, wash pots with warm, soapy water to make sure the carrier has been scrubbed away.
Herb, But No Weed
Pasteurizing used soil is one of the ways to get rid of a large number of unwelcome guests. Grass and weed seeds, insect eggs and fungal spores can all be killed by putting the old soil in a black garbage bag and then letting it bake in the sun for an afternoon. The heat pasteurizes the soil so it is ready for use. However, this also kills most of the friendly organisms, so you will need to top off the soil if you choose to pasteurize it. Bake the soil in the sun before boosting so you don’t kill off all the beneficial organisms you are submerging.
How to Recycle Soil
By recycling your used substrate, you can create a nutrient-rich, recycled soil that provides everything new plants need to stay healthy and produce rewarding harvests.
Check out proven methods below and choose the one you prefer to clean, revitalize and successfully recycle your soil.
Use Enzymes to Clean the Earth: The Long Approach
You are probably aware of the vital functions that microscopic substances in the soil perform. Lots of bacteria and fungi are constantly decomposing organic material and producing nutrients accessible to plants.
Both types of these microscopic life forms produce enzymes that break down the substances around them to produce food. Enzymes are basically miniature machines made up of proteins that carry out specific chemical reactions.
Just as bacteria and fungi use enzymes to process organic substances in the soil, growers can also take advantage of these tiny helpers!
Contrary to popular belief, plants do not actually obtain nutrients directly from the soil. Instead, they recruit an army of microbes to do the dirty work. Like true capitalists, they then trade sugars (which they produce during photosynthesis) for nutrients that fungi in the soil can make available.
Over time, these crucial nutrients are depleted in the soil, which is why growers top up their substrate from time to time. In addition, after a growing cycle, waste products and residues also accumulate in the soil.
The components of dead microbes, root pieces and insect parts gradually accumulate. Enzymes help accelerate the decomposition of even these residues and convert them into accessible nutrients.
After you have finished a grow and harvested a plant, you can realize the potential of the leftover soil by supplementing enzymes to make unused nutrients and additives available.
How to renew used soil with enzymes:
Remove the old root ball from the soil.
Select an enzyme product that is safe for plants and non-phytotoxic.
Apply the substance to your substrate.
Add some supplements such as worm humus and humic acid to add vital minerals back to the medium.
Let the substrate sit for 3 months to allow the enzymes to properly harness the organic material it contains.
Stir the mixture occasionally to aerate the soil.
Boil Off And Boost: A Faster Approach
Enzymes work well, but you’ll have to wait a few months before you can use that pile of soil again. If you need the soil much sooner, you can – instead of going to a store – use this faster approach to hurry your grow along.
Step 1: Clean the soil
As they grow and mature, plants develop large root balls. These systems help give shape and structure to the soil, making the substrate extremely firm and compact. At the end of the growing cycle, you’ll need to empty out your containers and loosen up the compacted soil. Empty out your old pots into a large plastic container, and rummage up the soil with your hands or a garden tool like a rake or trowel.

Step 2: Remove roots and earthworms
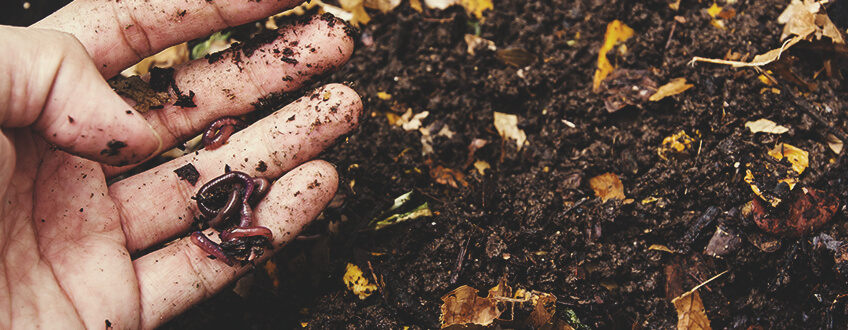
As you break apart and comb through the substrate, you will come across scattered roots and earthworms. Remove the roots, throw them on your compost and turn them into soil for the following season.
You should also gently remove the earthworms and place them on your compost pile or elsewhere in your garden. These little earth-building masters are anything but harmful and greatly increase the quality of the soil. They eat microbes and organic matter, and their droppings are rich in important nutrients like nitrogen.
Step 3: Pasteurize the soil
Pasteurizing will help kill any harmful microbes in your soil. Not all microbes help plants thrive. Some forms of fungi and bacteria work against a grower’s best interests and can cause disease.
Don’t worry; the process may sound complicated, but pasteurizing simply means pouring boiling water over your soil. Fill your container with boiling water so that the substrate is completely covered with water. Let the mixture sit for an hour.
Pour off the water and let your soil dry in the sun, preferably in a greenhouse or polytunnel. Once dry, you can transfer the soil into plastic bags and let it bake in the sun for a few days of disinfecting UV rays.
Step 4: Introduce New Life into the Earth
After following the above steps, you will have a clean but lifeless soil. Microbiological communities are critical to a healthy soil. Without them, you will have only an inactive mass of organic material. By introducing beneficial fungi and bacteria, you will bring the substrate back to life, allowing you to grow much healthier as well as more productive plants.
As for improving their soil, growers are spoiled for choice. We recommend adding worm humus and worms yourself to really get the process started.
Next, supplement the mix with a few spoonfuls of mycorrhiza. These life forms physically connect with plant roots and transport nutrients directly into the root system. Add beneficial bacteria like rhizobia to further increase nutrient availability and fight pathogens in the soil.
Step 5: Add Additional Soil
When you cleaned and amended your soil, it probably lost some of its volume. Replenish your supply with some old compost, ideally from your own composter, to make up for lost material.
Step 6: Transplant the seedlings
You’ve done it! Transplant your seedlings into your reclaimed, renewed soil and watch them thrive during the upcoming growing cycle.
Tips For Reusing Coconut Fiber
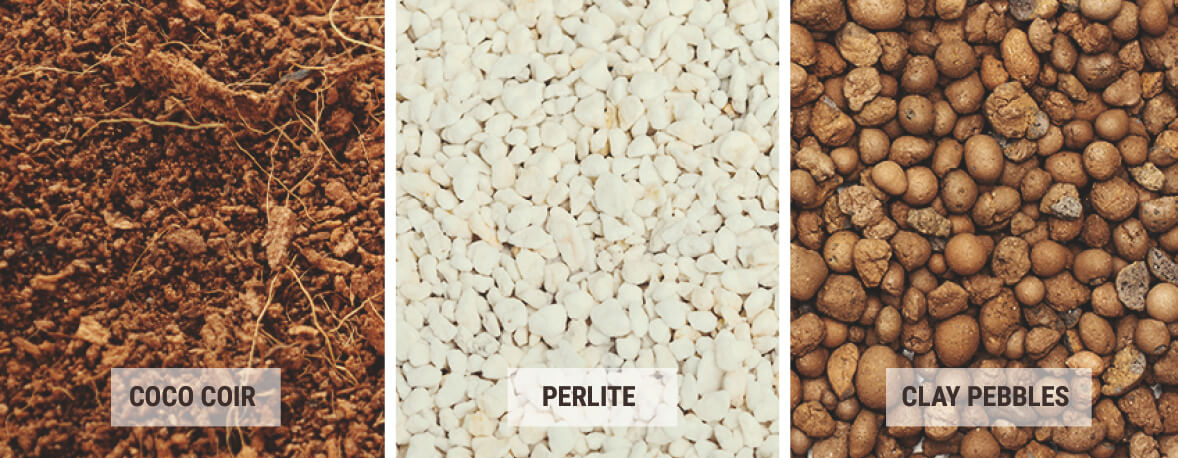
To reduce waste, you can also reuse other substrates such as coconut fiber. By following steps similar to those listed above, you can enhance this excellent substrate and use it for multiple growing cycles.
Follow these steps to reuse your coconut fiber:
Break up the coco fibers and remove any isolated roots.
Soak the coconut fibers in an enzyme solution to dissolve any smaller root debris that cannot be removed by hand.
Wash the coconut fibers with distilled water to remove residue and any remaining salts from the substrate.
Sterilize the coconut fibers with a hydrogen peroxide solution (35%).
Replenish your supply with fresh coconut fiber and you’re ready to start planting!

Tips For The Reuse Of Clay Granules Or Perlite
You don’t have to throw away clay granules or perlite either. Use the following method to clean and prepare them for your next grow:
Remove all dead plant material and bathe the substrate in an enzyme solution.
- Let the granules or perlite sit for 30 minutes, sieve the material and repeat the process.
- Place the granules or perlite in the sun for 2-3 days to disinfect, preferably under the film of a greenhouse.
- Use the granules or perlite again in your soil and hydroponic facilities.
- Other ways to use old soil
- If the process of amending your soil is too time-consuming for you, you can let nature do the work for you. Empty your bins into your composter and let the microbes break down the roots as well as other material over the next year so the breakdown products are ready for later use.
Alternatively, you can add old soil directly to raised beds as a surface fertilizer. Shred the soil and rake it into your beds to add organic material that will eventually break down into available nutrients.
You Can Always Reuse Soil, But Must Invest Labor
By enhancing your soil, you’re one step closer to a closed-loop growing system. You’ll minimize waste, save money and develop an invaluable skill. It may take time and effort, but the reward will be more than worth the work.

