I’d like to delve deeper into no-till gardening. That way, if you want to try it, you’ll know exactly what to do, how to do it, where to look for resources, and the pros and cons of this type of gardening.
Here’s what you need to know about no-till gardening:
Contents
What is no-till gardening?
A no-till style of gardening applies to a garden that does not require tilling. You don’t expose dirt when you start.
Instead, you place composting materials on the garden and let nature do the “tilling” for you.
Now you can do it in above ground garden beds or in a larger garden. It’s totally up to you. The idea behind no-till gardening is that you don’t have to break your back and the plants grow in a natural setting.
So, theoretically, it should help with garden pests and allow for more organic gardening without much fuss or expense.
If this works for you, you’ll want to learn how to do this with your own garden.
How to create your own no-till garden
1 Choose your gardening space
You’ll start this process by choosing your gardening space. You will obviously want as much sunlight as possible.
So keep that in mind when choosing your gardening space. Once you have chosen your space for your garden, you are ready to move on to the next step.
2 Gather Materials
Now that you know where you are going to garden, you will need to start gathering materials for your no-till garden.
This means you’ll need newspaper, old leaves, compost, chicken fertilizer and wood chips. The newspaper will be what you need to lay down in thick layers on your lawn. It will kill the grass while being biodegradable. The newspapers will end up adding something to your garden as they fall apart.
Next, you will need composting items. You can actually add compost itself, leaves that you rake in the fall, and chicken fertilizer. I actually recommend adding all of these items in layers. You will need a lot to get your garden going in the right direction from the start.
In this case, you will either need to purchase a tree cutting service or call a supplier of free (hopefully) wood chips delivered to your home. You will need to spread these wood chips over your garden in a thick layer. It is recommended that you start this method in the fall so that the wood chips and other items have time to decompose before planting.
3 Start layering your garden
Now that you have all your items, you need to start layering them. You will start with the newspaper as I mentioned above. You will want to cover every square inch of your garden space in the newspapers.
Then cover them up again. This is how you keep the grass from growing in your garden. If you don’t layer it thick enough, you will create the perfect mix for grass to grow (thick).
So be sure to cover the soil with thick layers of newspaper. Cardboard could also work well here. You just need something that will fall apart over time.
Then you’ll need to add a layer of leaves. It’s good to go between the newspaper and the compost because it keeps them in place to decompose and start composting on the soil.
Then you’ll add a layer of compost. If you have a small gardening space, you may be able to create enough for your garden.
However, if you have a larger garden, you may need to buy compost by the spoonful. The price is usually reasonable at nurseries. Just be aware that you will probably need to line up your purchases in advance.
Next, you’ll need to add chicken fertilizer. If you raise your own chickens, you may have enough to put in a small garden. We did it ourselves.
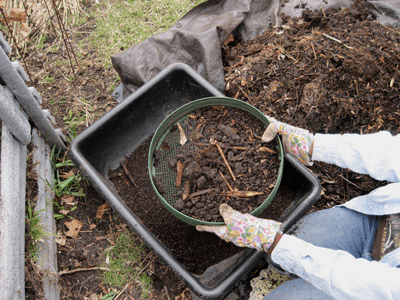
So we created a screen. The frame was made of wood and then we covered it with wire mesh. We would screen our chicken through the screen. This kept the large particles from entering the garden.
Then we would load it into wheelbarrows and place it in our garden.
However, we had a large garden space and were often offered chicken fertilizer from local chicken coops. We would take it and save ourselves some work. If you have rabbits, their fertilizer is perfect to go into your garden at this point.
Finally, you add wood chips. They are heavy, great for retaining moisture and also composting over time. They can still be acidic when placed in the garden as they will sit and start to decompose over the winter.
However, if you do this and don’t have time to let it all sit, you will need to buy mulch to go in the garden so the acid doesn’t burn the plants.
4 Wait, then plant
Once your garden is full of good stuff, you’ll just have to wait. We usually added all of this to our garden in the fall and allowed it to rest over the winter so it would be ready to go in the spring.
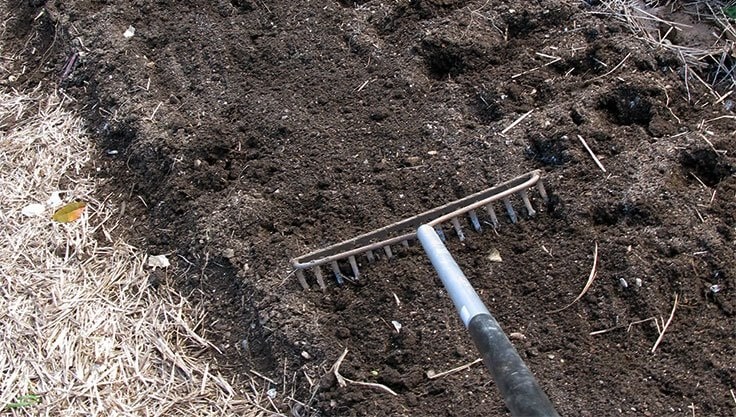
When spring comes, you simply use your hoe to develop rows and then plant your items in the ground. You will replace the mulch around your plants once they have sprouted. This will help reduce weeds.
5 Rinse and repeat
Once your garden starts to take off, you’ll be able to look at it and harvest it like any other garden. The idea is that the plants have such rich soil to develop that they will develop deep roots that will make all your plants richer.
So, in theory, this should deter insects from eating your plants and stop disease. If plants are attacked, you should let them go because they were weak. At least that’s what we were always told.
However, in the early years, while your soil is still developing rich nutrients, it can be difficult to develop plants with deep root systems, so you may still find it necessary to treat for insects and diseases. It’s up to you.
Then, once your harvest is complete, you will pull the plants and allow them to be added to the garden as compost.
Finally, you will add the same layers to your garden year after year. The soil should turn a deep black color and become richer over time.
The pros and cons of no-till gardening
The pros
The no-till method of farming has many advantages. Here are some of them:
- It’s a more natural way to garden
You can’t argue with nature. We know this method works because it is exactly the same method we see happening in nature.
So when you look in the forest and you see plants thriving, you have to know that this was not done by plowing. It was done through years and years of natural composting. This can help gardeners feel more connected to nature and do things better in a more natural way.
- In theory, it should make organic gardening easier
If you stick with no-till gardening long enough, you should be able to garden organically much more easily than other methods.
For example, if you still have work to do on your garden, you often have to buy different organic fertilizers, etc. With this method, the garden takes care of all that for you by pulling what it needs from the ground.
So this makes organic gardening more feasible for everyone, but especially for those who could not afford to do organic gardening before this method was explored.
- You should have a larger harvest
If you stick with this method long term, I have seen gardens on the internet absolutely thriving. They have huge crops that I have never seen in my own garden.
So, if you give your projects the natural environment in which they grow with their natural methods, it looks like you can reap a bountiful harvest with this.
The disadvantages
- It takes a lot of prep work
As I shared on the blog previously, we actually left no-till gardening. That’s the main reason here. It took a lot of prep work. I felt like I was trying to gather materials for the garden.
So, because we have such a large garden, it took us a long time to locate wood chips and chicken fertilizer, and we could never find enough newspaper and cardboard.
And that leads me to the next scam.
- If you don’t put the diapers on thick enough, you might have trouble
If you don’t put your compost layers on thick enough, you’re in trouble.
With us, we have such a large garden that it was hard to find enough material to cover with newspaper and cardboard thick enough to stop the grass.
So I was constantly fighting large amounts of grass in my garden. I worked harder with this method to get rid of the grass and weeds than when I was working.
- I think it takes the same amount of work
Finally, from my experience, I think the same amount of work is required, but step by step. With a till garden, you do a little weeding and tilling every week or so.
Also, you add different nutrients before you start planting, and then put them into the soil.
Well, with a no-till garden, it takes a lot of work to spread out all your materials. I can’t tell you how many days and hours I spent hauling wood chips to cover our garden.
Again, it would be totally different if we didn’t have such a large garden.
Things to consider
- Size of the garden
As you can see from my comments above, the size of your garden will have a huge impact on your gardening method.
You see, if you have a small garden, you could save newspapers throughout the year to cover your garden.
Then, you could buy (if you had to) a small amount of mulch or wood chips to spread over your garden. You could even raise a few chickens just to cover your manure needs.
But if you have a super-sized garden, then it becomes a whole different ballgame.
- Ease of locating materials
Next, you’ll need to determine how easy it will be for you to locate the materials you need. If you live in a very rural part of the world where you don’t have access to different businesses that might drop off things like compost and wood chips, this method might not make much sense. Unless you have access to all these items on your own land.
But if you live a little closer to the city, you may have easy access to these items and it would make sense to choose a no-till method of gardening.
- Budget
Finally, your budget must be considered. When you choose no-till gardening, unless you can find the items you need on your own land, you may not have access to a free source.
So you need to ask yourself if you could afford to buy these items. If so, you need to decide which method is more economical. Are you still saving money if you had to buy the materials for your no-till garden, or is it cheaper to just grow it?
As you can see, deciding whether or not to cultivate your garden can be a fairly complex decision that is influenced by many different variables surrounding the situation.
But I hope that if you decide to use this method, you now have a clear idea of how to proceed.
Now I want to hear from you. Are you growing your garden or not? Why or why not?
We love to hear from you, so leave your comments in the space below.


