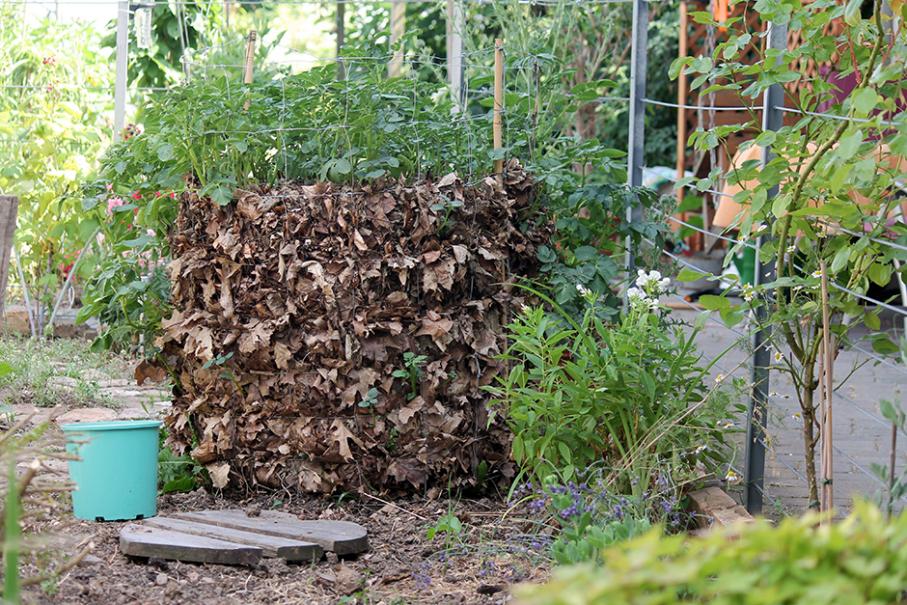
Growing potatoes high up is very clever. This process saves space, which is always interesting in small gardens. The potato tower can even be installed on a terrace or balcony.
Potato towers can be found in stores, but it is also very easy to make them with recycled materials, wire mesh or wood. All that remains is to place the tubers on a good substrate that will be watered judiciously, and to butter, butter, butter until the moment to empty everything!
How to make a potato tower ?
The potato tower is a method of cultivation that is conducted layer by layer. By burying the stems and leaves of the plants with compost or other substrate, rhizomes, future tubers, will form in the axils of these leaves. With each layer you add, you will increase the number of potatoes harvested.
Plan on a minimum of 40 cm of side or diameter for your potato tower. The height will depend on the “container” you make and the amount of potting soil you can put in it (remember that the weight is very important, especially after watering, which can be a problem on a balcony). In any case you cannot exceed 1 m height, which is already a lot for the plants. Indeed, the more effort they will have to make to get light, the less energy they will have to produce tubers in large numbers.
A tower of tires: this recycling is very practical because it is enough to put one tire on top of the other as the potatoes grow. The well insulated material of the tires and the black color store heat well, which is very welcome for the plants.
A cylinder of fine-mesh chicken wire: Roll the wire around itself to form a cylinder 40 to 80 cm in diameter. If your tower is to be placed on soil, place it on cardboard, for example, to prevent weeds, and with a round of wire mesh at the bottom to prevent field mice.
To limit the loss of soil, apply a layer of straw against the mesh, which will also keep the moisture and heat. The height is however already in place, which you will fill little by little with substrate.
A wooden box that can be raised: you can use pallets that you will dismantle to saw the elements at the right height (don’t forget to remove the nails!).
Prefer untreated wood, also avoid chipboard. Two possibilities: make several elements that you will lay one on top of the other, or make stakes in which you will interlock the boards (or any other interlocking system).
The most judicious for the harvest is to foresee that the bottom board is removable: the tubers of the bottom are the oldest. By lining the wooden walls with a geotextile felt you will keep more humidity in the tower.
A green waste bag, a jute bag or a potting soil bag can make a very respectable potato tower. At the start of the tower, the edge should be rolled up and gradually unrolled. Holes are drilled in the bottom to allow water to drain away. It is also possible to cut out the bottom of an identical bag and wrap it around the first one to obtain a real tower.
Growing potatoes in a tower
Planting potatoes
To save time on the development of your plants, sprout the tubers before planting: place them flat in the light, at a temperature between 3 and 9° for 3 to 4 weeks.
Place your sprouted tubers on a layer of potting soil or compost. Potatoes need sunlight, and a substrate temperature of at least 10°. The right time to plant potatoes is when the lilac flowers, from March in the warmest regions to the end of April in the coldest regions.
Tip: choose late varieties for this type of crop, they have the ability to form tubers longer than early varieties.
Videos from the experts
Potato care
Ridging
The principle of potato ridging is to raise the initial height, adding a tire, 1 or 2 heights of boards… and filling with the chosen substrate.
The potatoes are ridged several times during their development. This action allows not only to cover the already formed tubers so that they do not see the light (this activates the production of solanine which is toxic) but also to multiply the number of tubers per plant.
The first ridging is done when the plant is between 15 and 20 cm. You are going to add substrate to bury the stem and the first leaves, only the last 5 cm (the last 2 leaves) remain above ground.
Watering
Watering a potato tower is simple at the beginning, but becomes more complicated as the tower rises. Often the water does not reach the bottom of the tower and the bottom remains dry. To avoid this problem, use a micropore tube or a pierced tube to the bottom of the tower, so you can water the entire height.
Keep the substrate slightly humid during the emergence and development. From May-June, you can water a little more abundantly because the formation of the tubers has started and they need water to develop. The watering will continue until August. Then, after the end of the flowering, you will water very little, too much water would harm the maturation of the tubers.
The harvest
It is the faded foliage that signals the total maturation of the tubers. Start to dismantle progressively the floors of the tower by emptying the soil into a bucket. If you have planned a tower with a removable bottom, start there and keep the tower in place, emptying it as you go along. This will give the potatoes time to thicken their skin, making them more resistant to storage. However, the harvest will be finished in October.


