Every year I face the problem of sowing small-grain seeds at the right spacing. Most amateur gardeners will know exactly what I’m talking about. Lettuce, radish and carrot seeds in particular are so fine that it’s almost impossible to sow them at the optimum spacing.
Seed bands are a great option there, and they also save you from having to prick out plants that are too close together. But the convenience comes at a price. Seed tapes are quite expensive. Also, as with all purchased seeds, you should pay attention to the origin of the seeds. Unfortunately, seed bands with organic seeds are usually not so easy to get in local stores. Since we prefer to use our own seeds from the previous year anyway, I was looking for a DIY option.
Contents
Instructions for DIY seed tapes
- What you need
- Seeds (preferably self-harvested)
- Kitchen paper
- Water
- Flour
- Ruler and pencil
- scissors
- Bowl
- Syringe, brush or wooden stick
And this is how it works
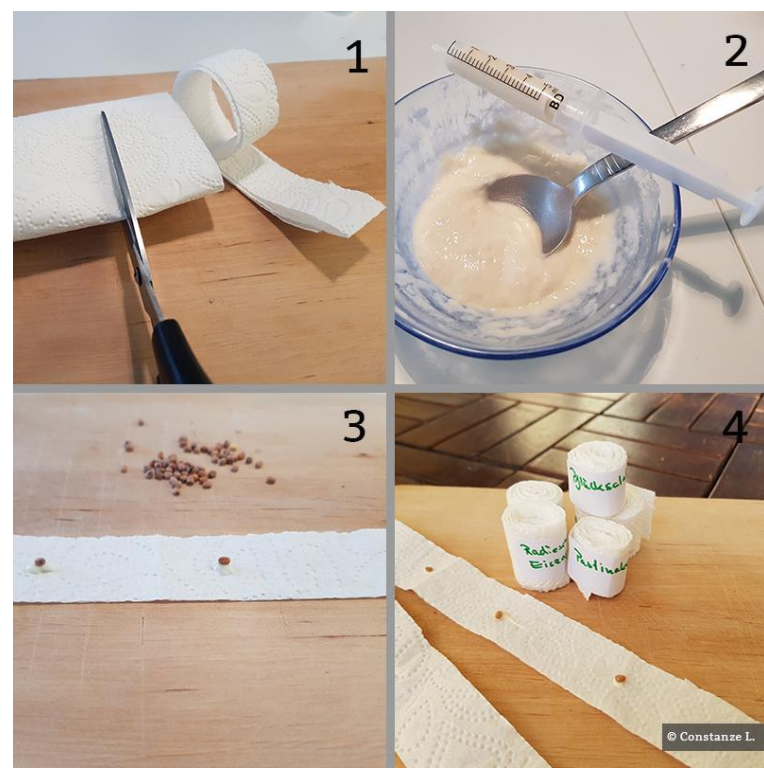
- cut kitchen paper into strips about 5 cm wide. The easiest way to do this,
roll the paper loosely and cut strips 5 cm apart.
cut strips. This creates even strips. (Image 1) - fold the strips in the middle and unfold them again.
- mix flour and water to a viscous mass. Depending on the amount required
two to three tablespoons of flour are sufficient. Then gradually add water until a viscous
viscous mass is formed. (picture 2) - place a ruler or folding rule next to the tape. Either draw the required
with a pencil or apply the natural flour glue with a wooden stick, brush or syringe.
a wooden stick, brush or syringe. (If children are helping,
you can mark a point where the flour glue and then the seed should be placed).
seed should be placed). - Now place the seed on the drops. (Figure 3)
- Now fold seed tape again at the crease and press firmly together. This prevents the
the grains from coming off the band. 7. - after a few hours the glue dots with the seeds are dry. Roll up the
Roll up the seed tape and label it. Use a dab of flour glue to secure the end
of the tape so that it does not unroll. This way the seeds can wait for the
wait for the perfect time to sow. (Picture 4)

Spreading seed tapes in the bed
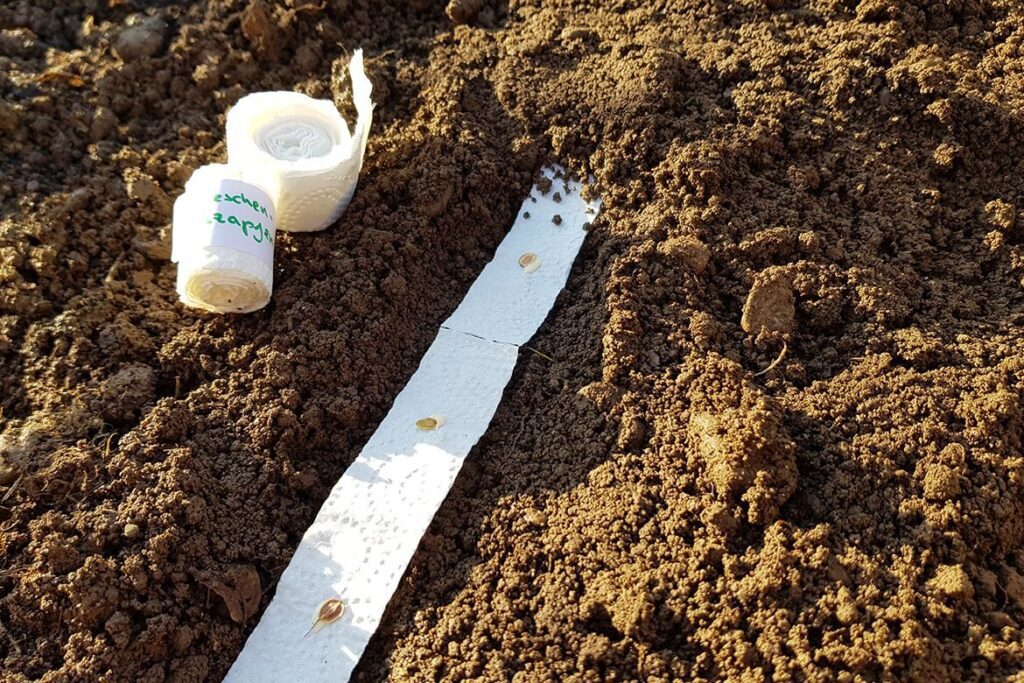
Draw grooves in your beds, making sure to use the recommended spacing. Now simply place the seed ribbons in the grooves, cover with a little soil and keep moist.
Have fun tinkering and a bountiful harvest!


