A boxwood can be transplanted without any problems. What you need to consider and what utensils are helpful, you will learn in this article.
Boxwoods grow evergreen and are often planted as hedges. Sometimes it is necessary to transplant boxwoods: If you need the space, want the plant somewhere else, or want to make sure your boxwood grows extensively. Transplanting is stressful for any plant, and boxwoods are no exception. For this reason, you should proceed properly and follow our tips.
Contents
Transplanting boxwood: What to consider

Timing:
- The best time is in autumn (circa September) or spring (circa March).
- The day should not be full sun and hot, and also not wet. A dry or/and cloudy day is best. Likewise, there should be no frost or drought.
- Avoid transplanting the boxwood during flowering. At that time you should leave your plants alone.
- When should you transplant your boxwood in the first place? The first replanting should be done after the plant has reached its basic shape. This can be achieved by regular pruning. See our article Pruning, planting and overwintering boxwood: our gardening tips. After that, transplanting is possible about every two to five years.
The new location:
- The new location should be bright, but not full sun all day. The boxwood does not like full sun so much. Therefore, it is best to choose a semi-shaded location.
- At best, the soil should be calcareous and loamy.
- Transplanting boxwoods that have grown together, for example, a hedge, is not recommended, but not impossible.
- Boxwoods are shallow growers. So keep enough distance from other plants.
How to transplant a boxwood

Helpful utensils:
- Spade
- sharp secateurs
- tape measure or meter stick
- garden or work gloves
- if necessary, bucket with water
How to do it:
- Prune out the boxwood in its old location. The root ball should be about as wide as the boxwood itself.
- If your boxwood is older, root pruning is recommended. The roots are then often bent and long. Pruning promotes the growth of new, strong roots. Use sharp pruning shears or loppers for this purpose. Only cut off thicker, older roots and any dead roots, not the small, fine roots (!). These are important for water absorption.
- Place the excavated tree temporarily in a bucket filled with water. Then the root ball can soak up moisture.
- Dig a hole that is about 15 centimeters wider than the root ball. The depth should be at least the length of the root ball, about 25 to 30 centimeters. The base of the root ball should be approximately flush with the ground.
- Mix the excavated soil with plant soil, compost and/or horn shavings to enrich it with nutrients.
- Place the boxwood plant in the center of the planting hole and fill it with substrate. Press everything down well all around. You can also carefully walk around the boxwood to firm up the soil with your body weight.
- Water the transplanted boxwood properly. You should also increase watering over the next two to three weeks. However, the plant should only be kept moist and not wet. This will allow the roots to bond with the soil in the new location.
Note: If the box tree gets yellow leaves a short time after transplanting, you should cut the tree back a little. Because then the roots are no longer sufficient for a sufficient supply. In addition, you can then fertilize the plant. Use organic fertilizers such as compost.
Transplanting boxwood in a pot

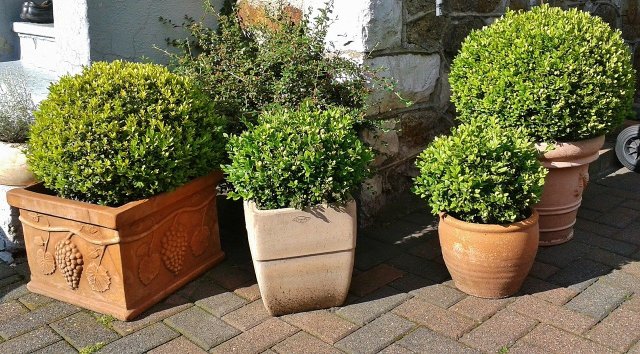
If you have a boxwood in a pot, it is advisable to repot it every three to four years. The older and larger a box tree becomes, the more nutrients it needs. If the pot is too small, nutrients are often scarce and the tree cannot develop properly.
- Choose a pot that is a few inches larger in diameter than the current one.
- The pot should have bottom openings to allow excess water to escape and prevent waterlogging. If the pot does not have this, you can also drill holes in it yourself. In addition, you should create a drainage in the form of pebbles or shards of clay.
- Glazed pots are best, as they do not dry out so quickly and can hold the nutrients.
- Otherwise, proceed as you would with boxwood outdoors: Prune the roots, water the tree, enrich the soil, put the tree in the new pot and water it properly.

